Squid AI Agent に Security を追加する
Auth0 authentication と backend authorization を使用して Squid AI agent を保護します。
Squid AI では、提供する unique context と tool に基づく rich AI agent experience を作成できます。Squid の robust backend functionality を使用すると、数行の code で AI agent を保護できます。
rule は basic にも、unique use case に合わせて必要なだけ customize することもできます。@secureAiAgent decorator を使用すると、TypeScript function を endlessly customizable な AI agent security solution に変えられます。security function は TypeScript で記述されるため、security rule の記述、interpret、update は他の function の update と同様に straightforward です。
この tutorial では、AI agent の作成と保護に必要な step の「what」と「why」を詳しく説明します。完了時には Squid AI Agent の理解に自信を持てるようになります。
構築するもの
- chat access を制限する authentication と authorization を構成した custom AI agent
- Squid AI Agent を実行する React frontend application
学ぶこと
- Squid AI agent の作成方法
- AI agent に context を提供する方法
- Squid AI agent を frontend に組み込む方法
- AI agent に security を追加する Squid Service の作成方法
必要なもの
- Squid CLI
- Squid Console の account
- React を使用するよう構成した single-page application を持つ Auth0 account
Environment Setup
- In the Squid Console, switch to the
devenvironment.
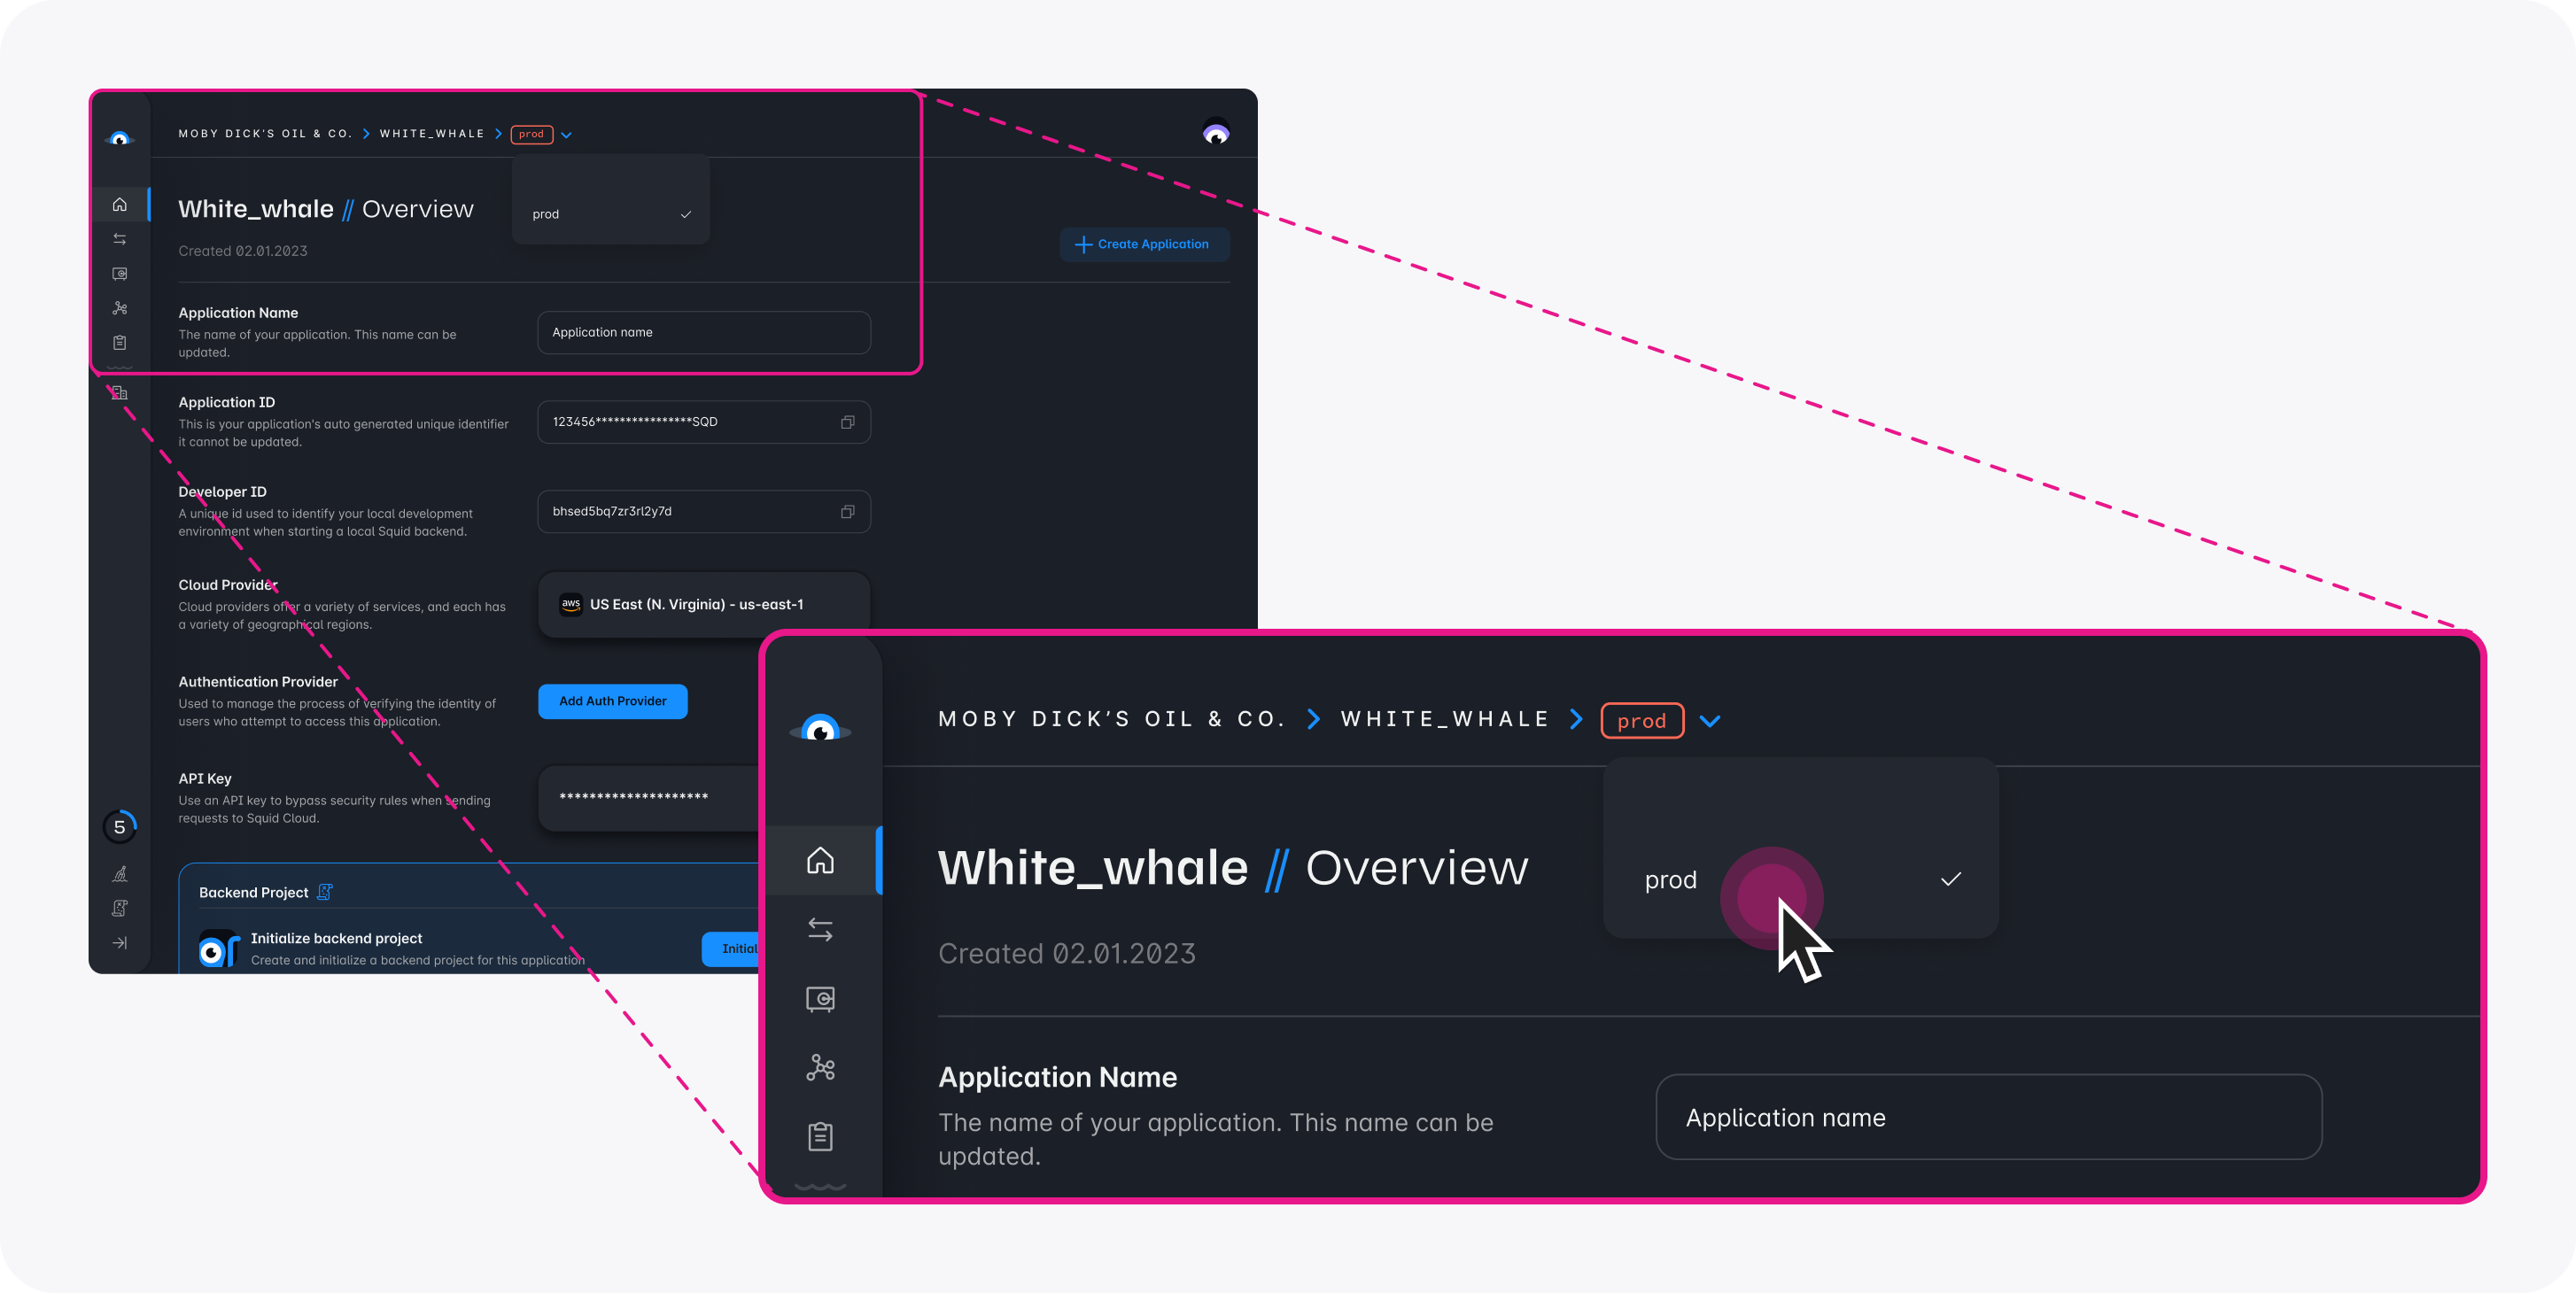
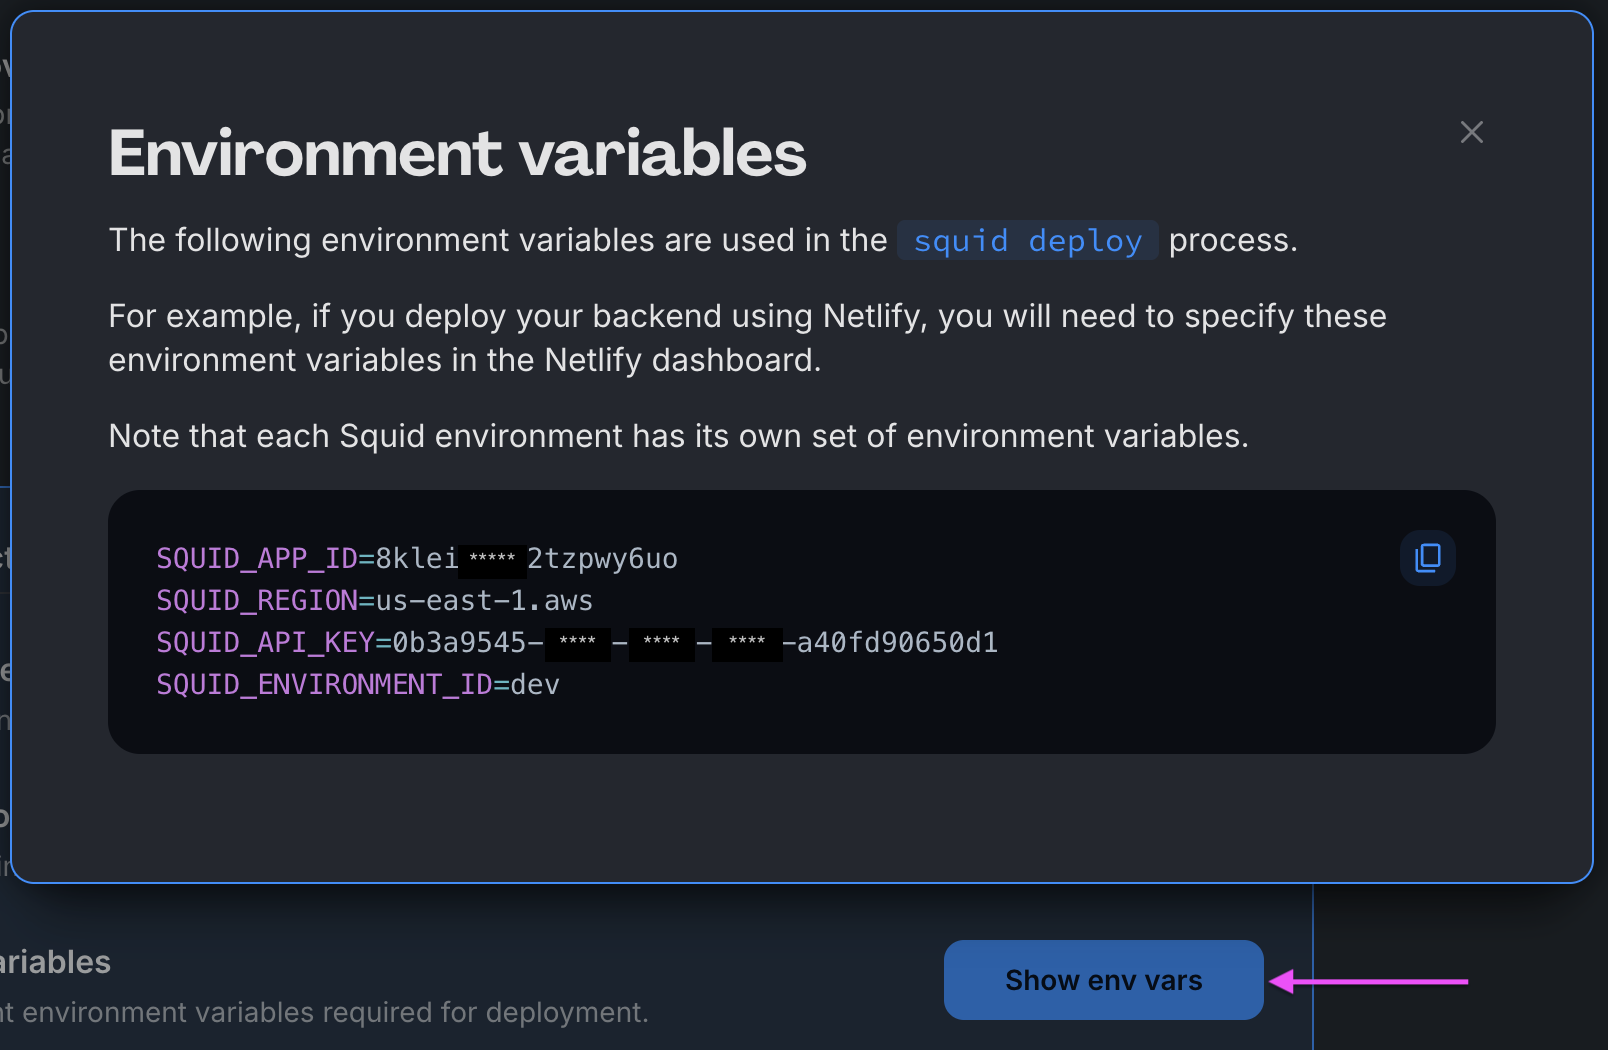
Download the ai-tutorial-secure-chat code sample using the following command. Replace the placeholders with the values from your Squid application as shown in the console.
npx @squidcloud/cli init-sample ai-tutorial-secure-chat --template ai-tutorial-secure-chat --appId YOUR_SQUID_APP_ID --apiKey YOUR_SQUID_API_KEY --environmentId dev --squidDeveloperId YOUR_SQUID_DEVELOPER_ID --region YOUR_REGION
You can find your environment variables under: 'Application' -> 'Show env vars' as seen below:
- Open the project in the IDE of your choice.
- Start the app locally by running the following command in the project folder:
npm run start
- To view the app, navigate to localhost:PORT, where PORT is logged in the terminal. The address will likely be
http://localhost:5173.
Squid AI Agent を追加する
- Squid Console で Agent Studio tab を選択します
- Create New Agent をクリックして agent を追加します。次の detail を指定してから、Create をクリックします。
- Agent ID:
squid-facts-chatbot - Description:
This is an agent for Squid AI's secure chat tutorial。
- AI agent の Overview page で、Instructions section に移動します。以下の instruction を追加します。
You're a friendly AI who shares random facts about squids and answers user questions about squids.
Important: Only answer based on the provided context.
- agent knowledge base に squid fact を追加するには、squid に関する Wikipedia articleに移動し、page を HTML または PDF file として保存します。次に Agent Overview page で Add Abilities をクリックします。Knowledge Base の File ability を選択し、file を upload します。この ability により、agent は question への回答時に context を使用できます。
LLM model はすでにこの squid information を認識している可能性があります。独自 application では、use case に relevant な context を提供します。
Auth0 Connector を追加する
-
Auth0 application をまだ作成していない場合は、まず Auth0 account を setup します。
次に Auth0 Dashboard に移動し、React を使用するよう構成された single-page application を作成します。application setting の Allowed Callback URLs、Allowed Logout URLs、Allowed Web Origins に
http://localhost:5173を追加してください。最後に、
squid-aiを API audience として使用して Auth0 API(Applications sidebar item 内)を作成します。 -
devenvironment の Squid Console で Connectors tab を選択します。 -
Available connectors tab をクリックして Auth0 connector を追加します。
- Connector ID:
auth0 - Auth0 Domain: この value は Auth0 application の setting で確認できます
- Audience:
squid-ai、または Auth0 API の作成時に入力した value
- Add connector をクリックします。
Auth0 Credential を追加する
squid-facts/frontend/src/main.tsxに移動します。configuration を必要とするAuth0Providercomponent があることに注目してください。Auth0Providercomponent の placeholder を Auth0 application の domain と client ID に置き換えます。
ReactDOM.createRoot(document.getElementById('root') as HTMLElement).render(
  <Auth0Provider
    domain="AUTH0_DOMAIN"
    clientId="AUTH0_CLIENT_ID"
    authorizationParams={{
      redirect_uri: window.location.origin,
      audience: 'squid-ai',
    }}
  >
    <SquidContextProvider
      options={{
        appId: import.meta.env.VITE_SQUID_APP_ID,
        region: import.meta.env.VITE_SQUID_REGION,
        environmentId: import.meta.env.VITE_SQUID_ENVIRONMENT_ID,
        squidDeveloperId: import.meta.env.VITE_SQUID_DEVELOPER_ID,
      }}
    >
      <App />
    </SquidContextProvider>
  </Auth0Provider>
);
App.tsxfile を開き、以下の import を追加します。
import { useAuth0 } from '@auth0/auth0-react';
import { useSquid } from '@squidcloud/react';
import { useEffect, useState } from 'react';
これにより、standard React functionality に加え、Auth0 と Squid React library が import されます。
Appfunction に次の code を追加します。
// Get Auth0 authentication state.
const { user, isLoading, getAccessTokenSilently } = useAuth0();
const { setAuthProvider } = useSquid();

useEffect(() => {
  setAuthProvider({
    integrationId: 'auth0',
    getToken: () => user && getAccessTokenSilently(),
  });
  if (isLoading) return;
  if (!user) {
    setLoginMessage('You are logged out!');
    setToastOpen(true);
  } else {
    setLoginMessage('You are logged in!');
    setToastOpen(true);
  }
}, [user, isLoading, getAccessTokenSilently, setAuthProvider]);

if (isLoading) {
  return <span>Loading...</span>;
}
この code は Squid application の auth provider を設定し、Auth0 の Access token を Squid backend に渡します。
- return statement で、
isAuthenticatedprop の value をfalseから!!userに変更します。
<NavBar isAuthenticated={!!user} />
これにより NavBar に、login button と logout button のどちらを表示すべきかが通知されます。
Checkpoint
ここまでで App.tsx に含まれるすべての code を追加しました。最終 file は以下のとおりです。
import SquidFactsAI from './components/squid-facts-ai';
import './App.css';
import NavBar from './components/nav-bar';
import { useEffect, useState } from 'react';
import { useAuth0 } from '@auth0/auth0-react';
import { useSquid } from '@squidcloud/react';
import { Snackbar, Alert } from '@mui/material';

function App() {
  // Set state of toast message
  const [toastOpen, setToastOpen] = useState(false);
  const [loginMessage, setLoginMessage] = useState('');

  // Get Auth0 authentication state
  const { user, isLoading, getAccessTokenSilently } = useAuth0();
  const { setAuthProvider } = useSquid();

  useEffect(() => {
    setAuthProvider({
      integrationId: 'auth0',
      getToken: () => user && getAccessTokenSilently(),
    });
    if (isLoading) return;
    if (!user) {
      setLoginMessage('You are logged out!');
      setToastOpen(true);
    } else {
      setLoginMessage('You are logged in!');
      setToastOpen(true);
    }
  }, [user, isLoading, getAccessTokenSilently, setAuthProvider]);

  if (isLoading) {
    return <span>Loading...</span>;
  }

  const handleToClose = () => {
    setToastOpen(false);
  };

  return (
    <>
      <NavBar isAuthenticated={!!user} />
      <img src="https://upload.wikimedia.org/wikipedia/commons/e/e1/Sepioteuthis_sepioidea_%28Caribbean_Reef_Squid%29.jpg" />
      <SquidFactsAI />
      <Snackbar open={toastOpen} onClose={handleToClose} autoHideDuration={6000}>
        <Alert severity="success">{loginMessage}</Alert>
      </Snackbar>
    </>
  );
}

export default App;
Squid AI Agent Functionality を追加する
src/componentsfolder で、squid-facts-ai.tsxfile を開きます。return statement まで scroll down すると、TextFieldcomponent とButtoncomponent があります。ここで user は AI agent に question を尋ねます。chat history が表示される emptydivcomponent もあります。 以下の import を追加します。
import Messages from './messages';
import { useAiChat } from '@squidcloud/react';
useAiChat function を使用すると、client は Squid AI を使用して chat できます。
SquidFactsAIfunction に以下を追加します。
const { history, chat, complete, error } = useAiChat('squid-facts-chatbot');
- 現在、
askQuestionfunction はquestionの value を empty string に設定するだけで、実際に question を尋ねていません。AI agent に question を尋ねるために、askQuestionにchatfunction を追加します。
function askQuestion() {
  chat(question);
  setQuestion('');
}
- empty
divにMessagescomponent を追加します。
<div className="scrolling">
  <Messages messages={history} />
</div>
これにより conversation history が Messages component の prop に渡され、表示されます。
- chat response が complete するまで disable されるように
Buttonを update します。さらに、AI agent 使用中に error が発生した場合に error message を表示するdivを追加します。
...
return (
...

<Button variant="contained" disabled={!complete} onClick={askQuestion}>
  Ask question
</Button>
{ error && <div>{error.toString()}</div>}

...
)
Checkpoint
これでこの component の code は完成です。squid-facts-ai.tsx file のすべての code を以下に示します。
import { ChangeEvent, useState } from 'react';
import { TextField, Button } from '@mui/material';
import Messages from './messages';
import { useAiChat } from '@squidcloud/react';

const SquidFactsAI = () => {
  const [question, setQuestion] = useState('');
  const { history, chat, complete, error } = useAiChat('squid-facts-chatbot');

  function askQuestion() {
    chat(question);
    setQuestion('');
  }

  function questionChanged(e: ChangeEvent) {
    setQuestion((e.target as HTMLInputElement).value);
  }

  function checkKey(ele: React.KeyboardEvent<HTMLDivElement>) {
    if (ele.key === 'Enter') {
      askQuestion();
    }
  }

  return (
    <>
      <div className="scrolling">
        <Messages messages={history} />
      </div>
      <div className="question">
        <TextField fullWidth id="outlined-basic" label="Enter your question" variant="outlined" onChange={questionChanged} onKeyDown={(event) => checkKey(event)} value={question} />
        <Button variant="contained" disabled={!complete} onClick={askQuestion}>
          Ask question
        </Button>
        {error && <div>{error.toString()}</div>}
      </div>
    </>
  );
};

export default SquidFactsAI;
Messages Component をセットアップする
messages.tsx file を開き、file content を以下の code に置き換えます。
import { useEffect, useRef } from 'react';
import { ChatMessage } from '@squidcloud/react';

interface ChatHistoryProps {
  messages: ChatMessage[];
}

const Messages: React.FC<ChatHistoryProps> = ({ messages }) => {
  const messagesEndRef = useRef<HTMLDivElement>(null);

  const scrollToBottom = () => {
    messagesEndRef.current?.scrollIntoView({ behavior: 'smooth' });
  };

  useEffect(() => {
    scrollToBottom();
  }, [messages]);

  return (
    <div className="messages">
      {messages.map(({ id, message, type }) => (
        <div key={id}>
          <span key={id}>
            <b>{type}:</b> {message}
          </span>
        </div>
      ))}
      <div ref={messagesEndRef} />
    </div>
  );
};

export default Messages;
この code は chat message を表示します。ChatMessage の type は message の author です。user または AI のいずれかです。
Squid Backend で AI Agent を保護する
backend folder に移動します。ここには Squid backend logic が含まれます。src/service/ai-security-service.ts file を開き、以下の code を file に追加します。
import { secureAiAgent, SquidService } from '@squidcloud/backend';

export class AiSecurityService extends SquidService {
  @secureAiAgent('squid-facts-chatbot')
  allowChat(): boolean {
    // or add custom authorization here
    return this.isAuthenticated();
  }
}
これにより、authenticated client が AI agent と chat することを許可する Squid Service が作成されます。frontend で call した setAuthProvider function は、user の authentication status を backend に通知します。@secureAiAgent decorator は security rule の設定に使用されます。この example は user が authenticated であることだけを verify しますが、custom authorization rule を追加できます。たとえば database に query を実行し、user が permitted user list の一部であるかを確認できます。
securityと authenticationの詳細については documentation を参照してください。
App を試す
- backend をローカルで実行するには、
backenddirectory で以下の command を実行します。
squid start
- 別の terminal window で、
frontenddirectory から以下の command を実行します。
npm run dev
これで terminal window が 2 つになり、1 つは backend、もう 1 つは frontend を実行しています。
-
app を表示するには、terminal に log 出力された PORT の localhost:PORT に移動します。address は通常
http://localhost:5173です。 -
AI agent に squid に関する question を尋ねます。response を受け取れないことに注目してください。代わりに unauthorized message が表示されます。
-
app に login して、再度 question を尋ねます。AI agent が chat を開始します!
自由に question を続けて尋ね、logout と login の際の動作を確認してください。backend の Squid Service が authorization を処理するため、authenticated user のみが service に access できることを確信できます。
試す question:
- squid に arm はありますか、それとも tentacle がありますか?
- squid に遭遇した場合は何をすべきですか?
- squid に関するお気に入りの fact は何ですか?
- Onykia ingens について教えてください。
お気に入りの squid question と answer を、Discord または X の Squid Squad と共有してください。
結論
おめでとうございます!customized AI agent を app に追加し、Squid Backend SDK を使用して保護しました。この AI agent が squid についてどれほど知っているかを確認するために、自由に question を続けて尋ねてください!
次のステップ
authenticated user への AI agent access の制限方法を理解したので、次のことも試せます。
- use case に基づく新しい AI agent を追加します。たとえば Squid AI agent は、sales、support、product expert など、user engagement の各 part に異なる persona をサポートできます。
- Squid middle tier を使用して database を frontend に接続し、Squid Client SDK を通じた data access capability を有効にします。
- Squid AI Agent を保護できる他の property を考えます。たとえば user に最初に consent form へ sign してもらう場合があります。database に consent status を log し、backend で user が login 済みで consent form に sign 済みであることを verify できます。
Cleanup
追加 billing を防ぐには、Squid Console で app の Overview tab を選択し、Delete Application まで scroll down して Squid app を削除します。