Custom Frontend を使用して AI Agent を作成する
Squid では Squid AI を使用して unique user experience を作成できます。squid に関する question に answer する AI agent を作成しましょう!
構築するもの
- unique knowledge base を持つ React frontend application で実行される custom AI agent
Environment Setup
- In the Squid Console, switch to the
devenvironment.
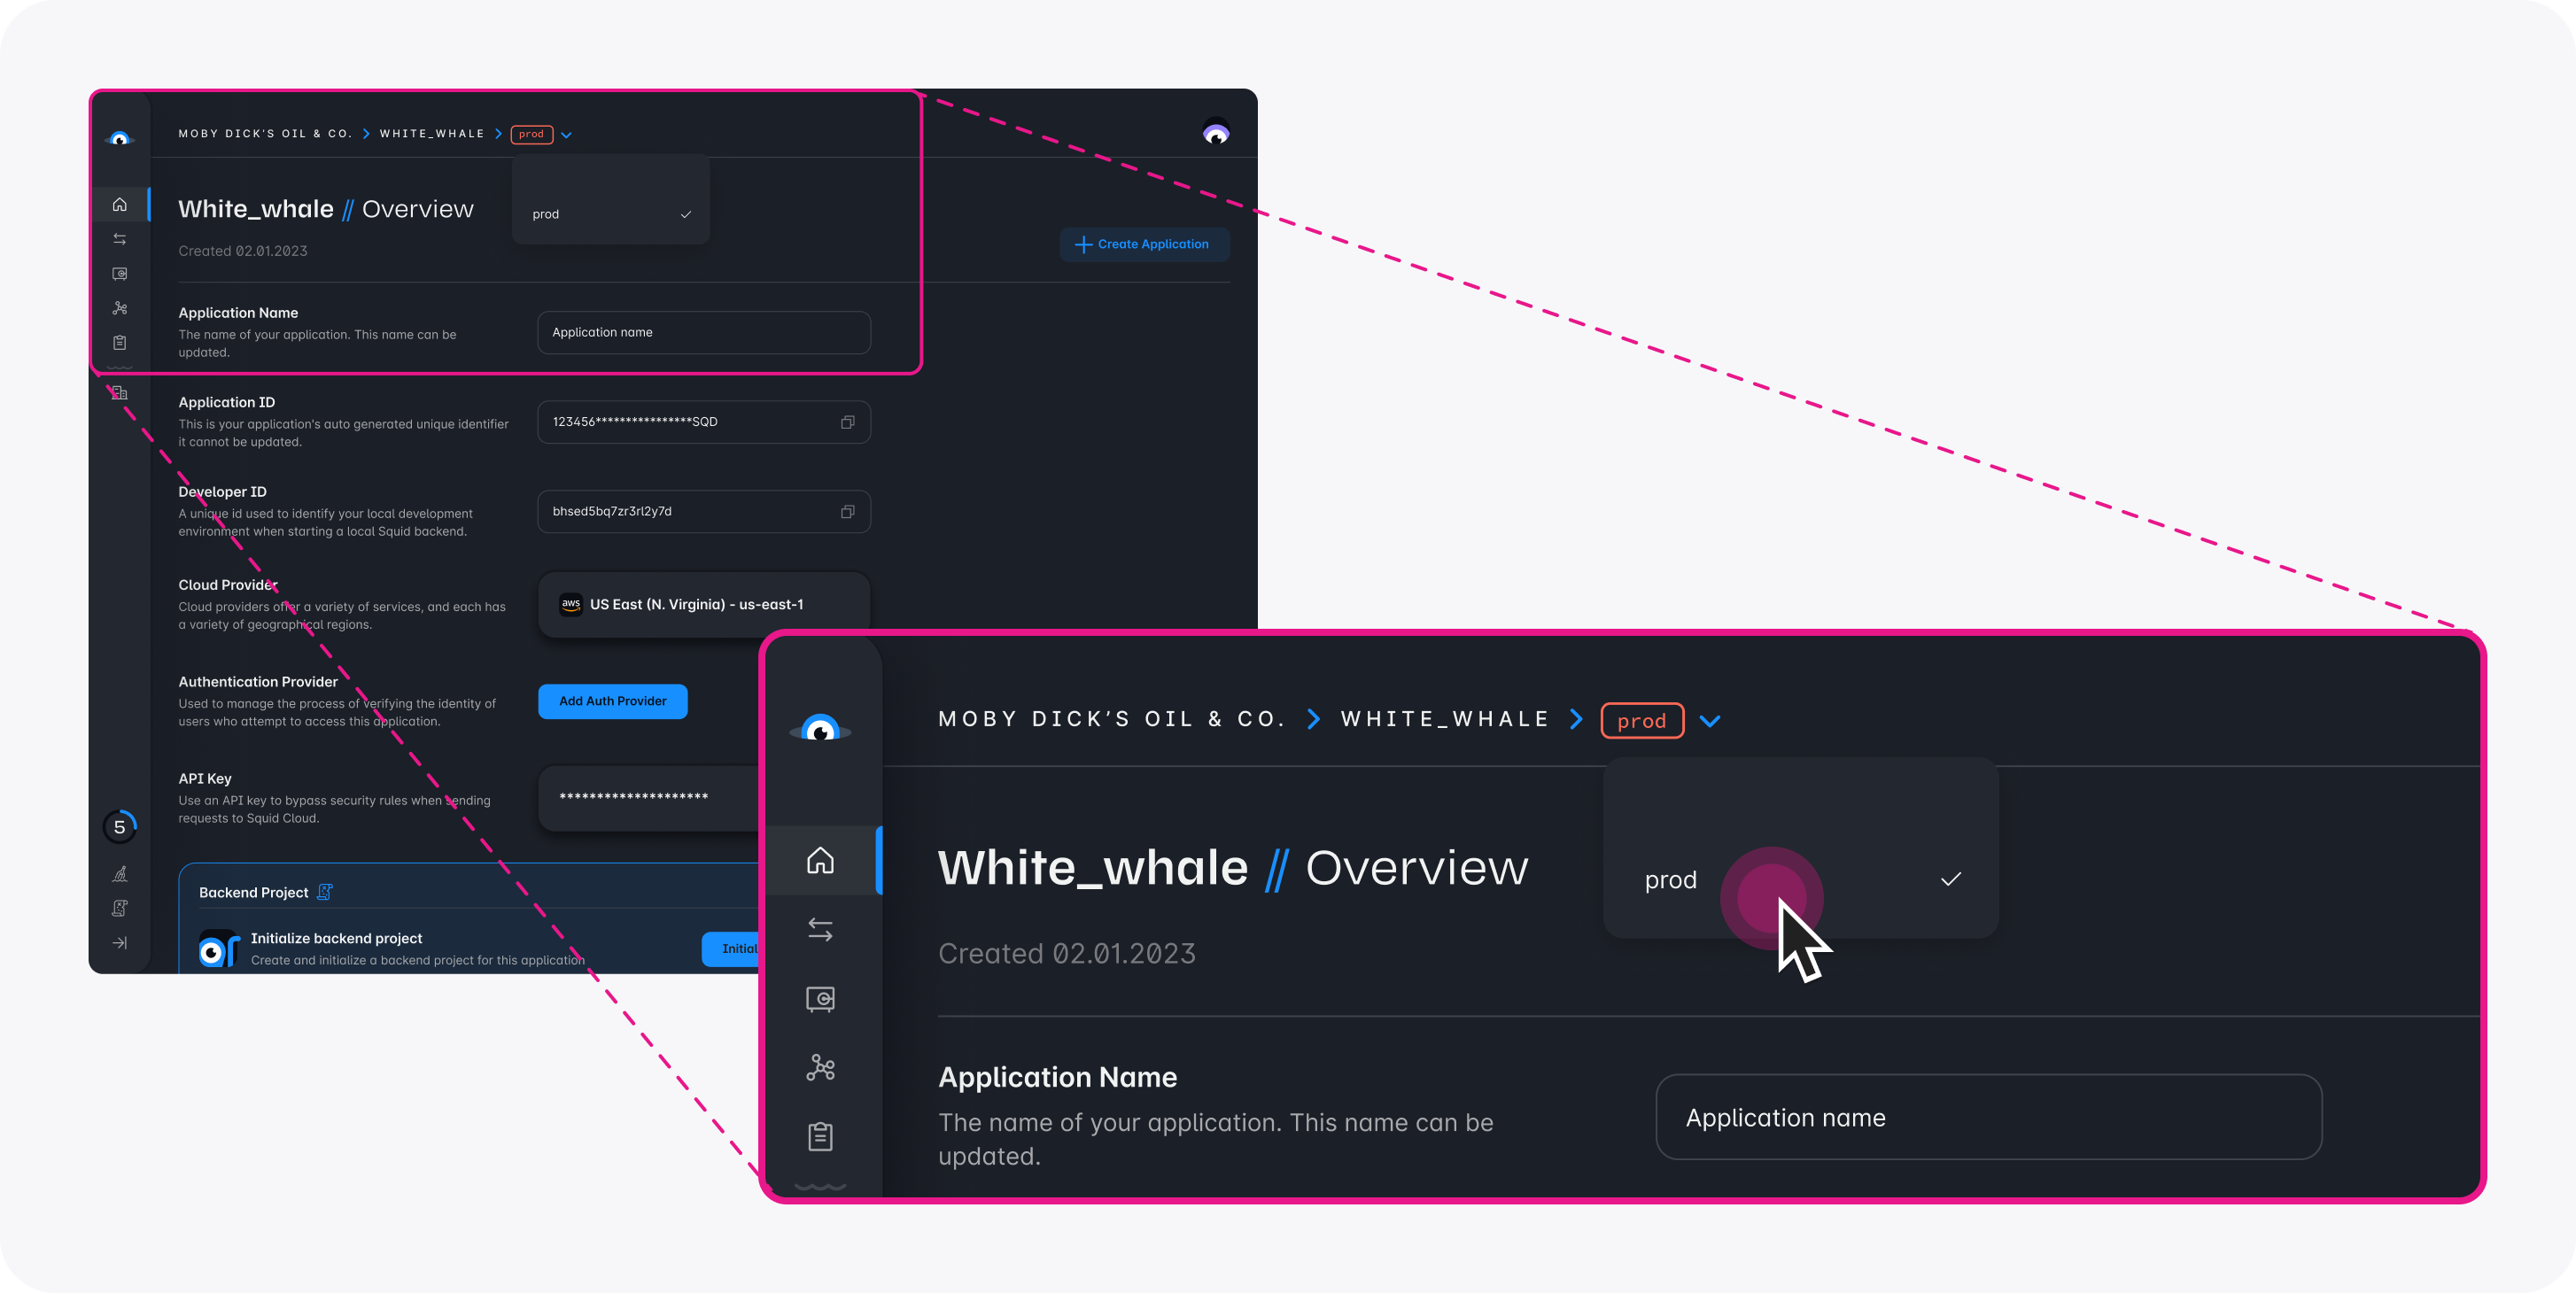
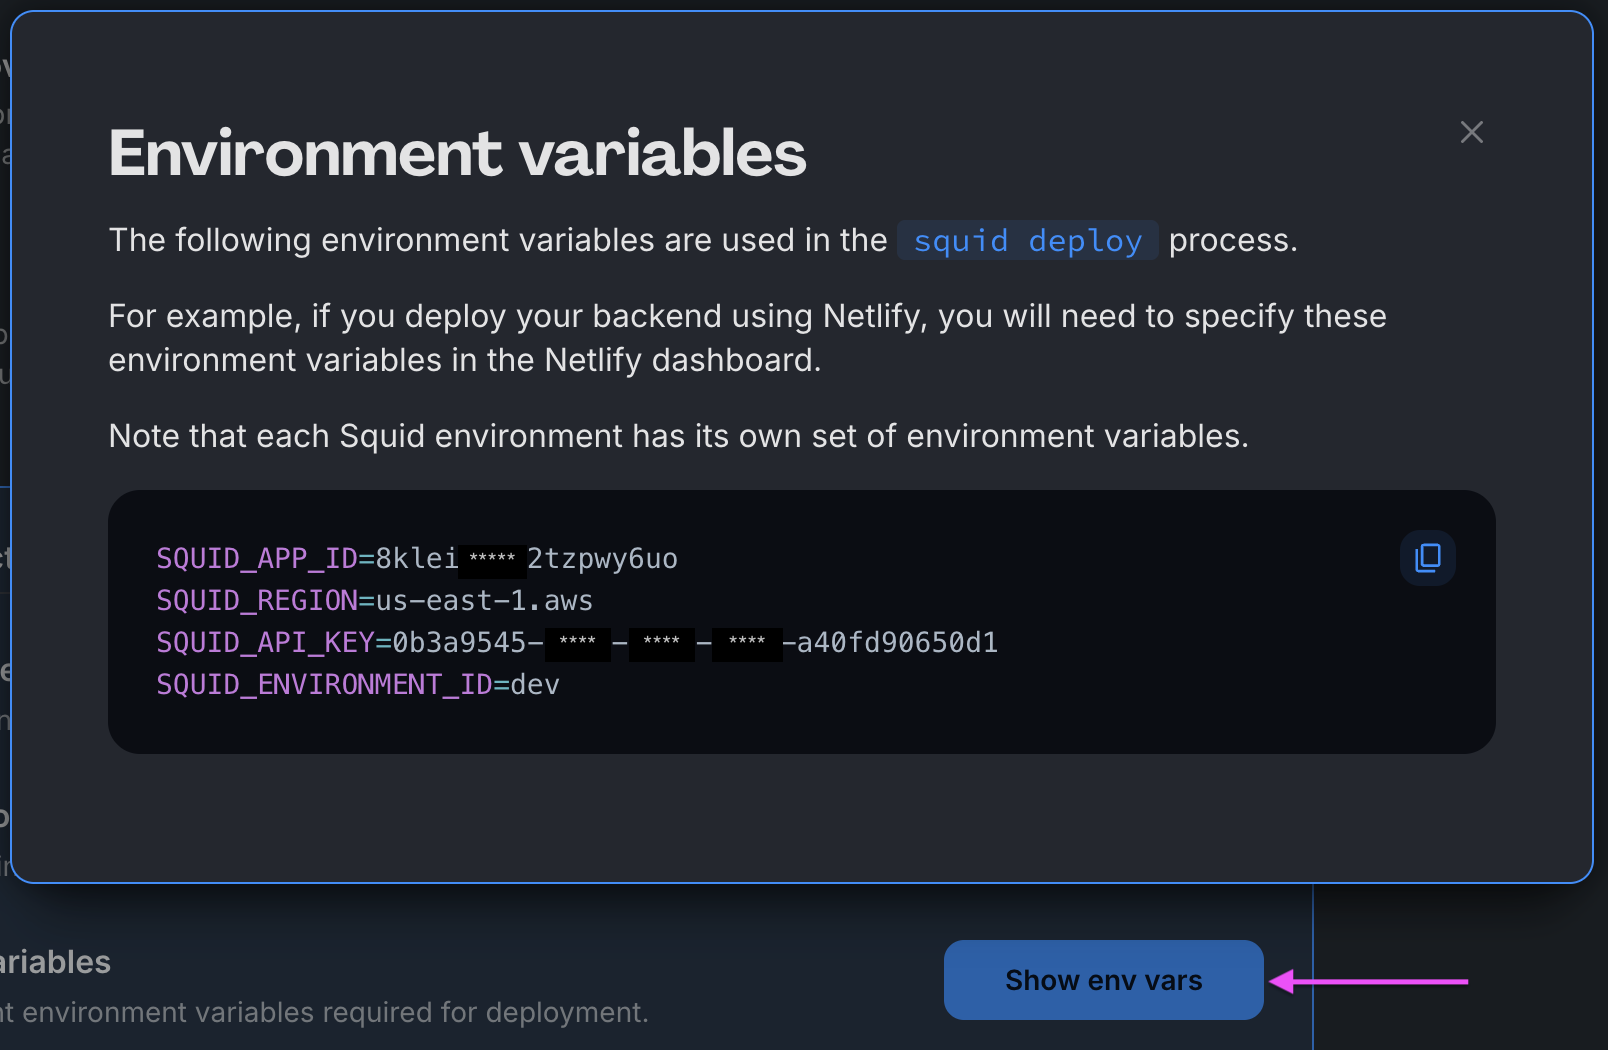
Download the ai-tutorial-squid-facts code sample using the following command. Replace the placeholders with the values from your Squid application as shown in the console.
npx @squidcloud/cli init-sample ai-tutorial-squid-facts --template ai-tutorial-squid-facts --appId YOUR_SQUID_APP_ID --apiKey YOUR_SQUID_API_KEY --environmentId dev --squidDeveloperId YOUR_SQUID_DEVELOPER_ID --region YOUR_REGION
You can find your environment variables under: 'Application' -> 'Show env vars' as seen below:
- Open the project in the IDE of your choice.
- Start the app locally by running the following command in the project folder:
npm run start
- To view the app, navigate to localhost:PORT, where PORT is logged in the terminal. The address will likely be
http://localhost:5173.
Squid AI Agent を追加する
-
Squid Console で Agent Studio tab を選択します。
-
Create New Agent をクリックして agent を追加します。次の detail を指定してから、Create をクリックします。
- Agent ID:
squid-facts - Description:
This is an agent for Squid AI's fact sharing tutorial
- AI agent の Overview page には、LLM Model、Instructions、Abilities の 3 つの section があります。
-
LLM Model: agent を動かす underlying AI model です。default GPT-4o model を使用するか、別のものを選択できます。
-
Instructions: AI agent の response と question への answer 方法に関する rule set です。tone や purpose を指定できます。squid-facts agent instruction を次のように edit します。
You're a friendly AI who shares random facts about squids and answers user questions about squids.
Important: Only answer based on the provided context. -
Abilities: question への response 時に agent が使用する information と tool です。ability の詳細については、documentationを参照してください。
agent knowledge base に squid fact を追加するには、squid に関する Wikipedia articleに移動し、page を HTML または PDF file として保存します。次に console で Add Abilities をクリックします。Knowledge Base の File ability を選択して file を upload します。この ability により、agent は question に answer する際に context を使用できます。
LLM model はすでにこの squid information を認識している可能性があります。独自 application では use case に relevant な context を提供します。
-
AI agent の Agent Settings tab に移動して、Set Agent to Public まで scroll down します。frontend 上で誰でも agent に access できるように、この setting を on に toggle します。詳細については、AI agent の保護に関する documentationを参照してください。
-
Context 横の + をクリックして context を追加します。context に Squid Wikipedia と name を付けます。Context type を URL に変更し、次の URL を入力します。
AI agent を持つ Squid project ができたので、app に functionality を追加する準備ができました!
Frontend を構成する
The following steps add configuration parameters to connect the application to Squid.
- Open a new terminal window and navigate to the project's frontend. You should now have two open terminal windows: one for the app's backend and one for the frontend.
cd frontend
- Install the required dependencies:
npm install
- Run the following command to create a
.env.localfile with the Squid environment configuration needed to initialize Squid:
npm run setup-env
Frontend を Customize する
- frontend で、
componentsfolder にあるsquid-facts-ai.tsxcomponent を開きます。folder には、現在はほぼ空の component があります。
function SquidFactsAI() {
  return <></>;
}

export default SquidFactsAI;
- frontend で AI agent を使用するため、file の先頭に次の import statement を追加します。
import { useAiChat } from '@squidcloud/react';
SquidFactsAI()function に次の constant を追加します。これらは AI agent との conversation state の管理に使用されます。
const [question, setQuestion] = useState('');
const { history, chat, complete } = useAiChat('squid-facts');
variable question と setQuestion は standard useState hook を使用し、user が尋ねる question の state を管理します。
useAiChat hook は AI agent を wrap します。Agent ID を 2 つ目の parameter として取り、chat、data、complete などの複数 result を返します。
useAiChat の詳細については、React SDK documentationを参照してください。
- constant の後に以下の function を追加します。
function askQuestion() {
  chat(question);
  setQuestion('');
}

function questionChanged(e: ChangeEvent) {
  setQuestion((e.target as HTMLInputElement).value);
}

function checkKey(ele: React.KeyboardEvent<HTMLDivElement>) {
  if (ele.key === 'Enter') {
    askQuestion();
  }
}
askQuestion function は、string form の AI agent prompt を受け取る Squid Client SDK の chat function を call します。
questionChanged と checkKey function は、user が question を尋ねる際の UI change を処理します。
- existing return を以下の code に置き換えます。
return (
  <>
    <div className="scrolling">
      <Messages messages={history} />
    </div>
    <div className="question">
      <TextField fullWidth id="outlined-basic" label="Enter your question" variant="outlined" onChange={questionChanged} onKeyDown={(event) => checkKey(event)} value={question} />
      <Button variant="contained" disabled={!complete} onClick={askQuestion}>
        Ask question
      </Button>
    </div>
  </>
);
この code は chat history を、user と AI agent の conversation を表示する Messages component に渡します。また、user が question を入力する input component と、askQuestion function を trigger する button も含まれます。
- 追加した内容に必要な import を追加します。import は以下のようになります。
import { useAiChat } from '@squidcloud/react';
import Messages from './messages.tsx';
import { Button, TextField } from '@mui/material';
import React, { ChangeEvent, useState } from 'react';
messages.tsxfile を開きます。file のすべての content を以下の code に置き換えます。この code は chat message の array を iterate し、message を表示します。
import { useEffect, useRef } from 'react';
import { ChatMessage } from '@squidcloud/react';

interface ChatHistoryProps {
  messages: ChatMessage[];
}

const Messages: React.FC<ChatHistoryProps> = ({ messages }) => {
  const messagesEndRef = useRef<HTMLDivElement>(null);

  const scrollToBottom = () => {
    messagesEndRef.current?.scrollIntoView({ behavior: 'smooth' });
  };

  useEffect(() => {
    scrollToBottom();
  }, [messages]);

  return (
    <div>
      {messages.map(({ id, message, type }) => (
        <div key={id}>
          <span key={id}>
            {type}: {message}
          </span>
        </div>
      ))}
      <div ref={messagesEndRef} />
    </div>
  );
};

export default Messages;
Code を実行する
- root project folder で、app を表示するために以下の command を実行します。
npm run start
app を表示するには、terminal に log 出力される PORT の localhost:PORT に移動します。address は通常 http://localhost:5173 です。
なぜ page に squid の picture があるのか、と思うかもしれません。もちろんそんなことは尋ねません。squid に関する app だからです。
- AI agent に squid について question を尋ねます。困ったときは、以下の example を試してください。
- squid に arm はありますか、それとも tentacle がありますか?
- squid に遭遇した場合は何をすべきですか?
- squid に関するお気に入りの fact は何ですか?
- Onykia ingens について教えてください。
お気に入りの squid question と answer を、Discord または X の Squid Squad と共有してください。
結論
おめでとうございます!Squid AI application を作成しました。この AI agent が squid についてどれほど知っているかを確認するために、自由に question を続けて尋ねてください!
次のステップ
public Squid AI agent の作成方法を理解したので、次の step を実行できます。
-
use case に基づく新しい agent を追加します。たとえば Squid AI は、sales、support、product expert など、user engagement の各 part に異なる persona をサポートできます。
-
Squid AI への access を制限する Squid security ruleを実装します。
-
Squid middle tier を使用して database を frontend に接続し、Squid Client SDK を通じた data access capability を有効にします。