Snowflake Database を統合する
Snowflake database を接続し、Squid の real-time streaming、robust query、AI capability を活用します。
TL;DR
この tutorial では、新しい Snowflake database を Squid project に接続する方法を学びます。内容は以下を含みます。
- Squid Console で integration を作成する
- external database の security rule を適用する
- client project から Squid を使用して Snowflake database に query する
この tutorial では、React と Squid を使用して Snowflake table の sample data に接続します。database terminology、React、Squid platform の基本的な理解があると役立ちますが、この guide に前提条件はありません。
Environment Setup
- In the Squid Console, switch to the
devenvironment.
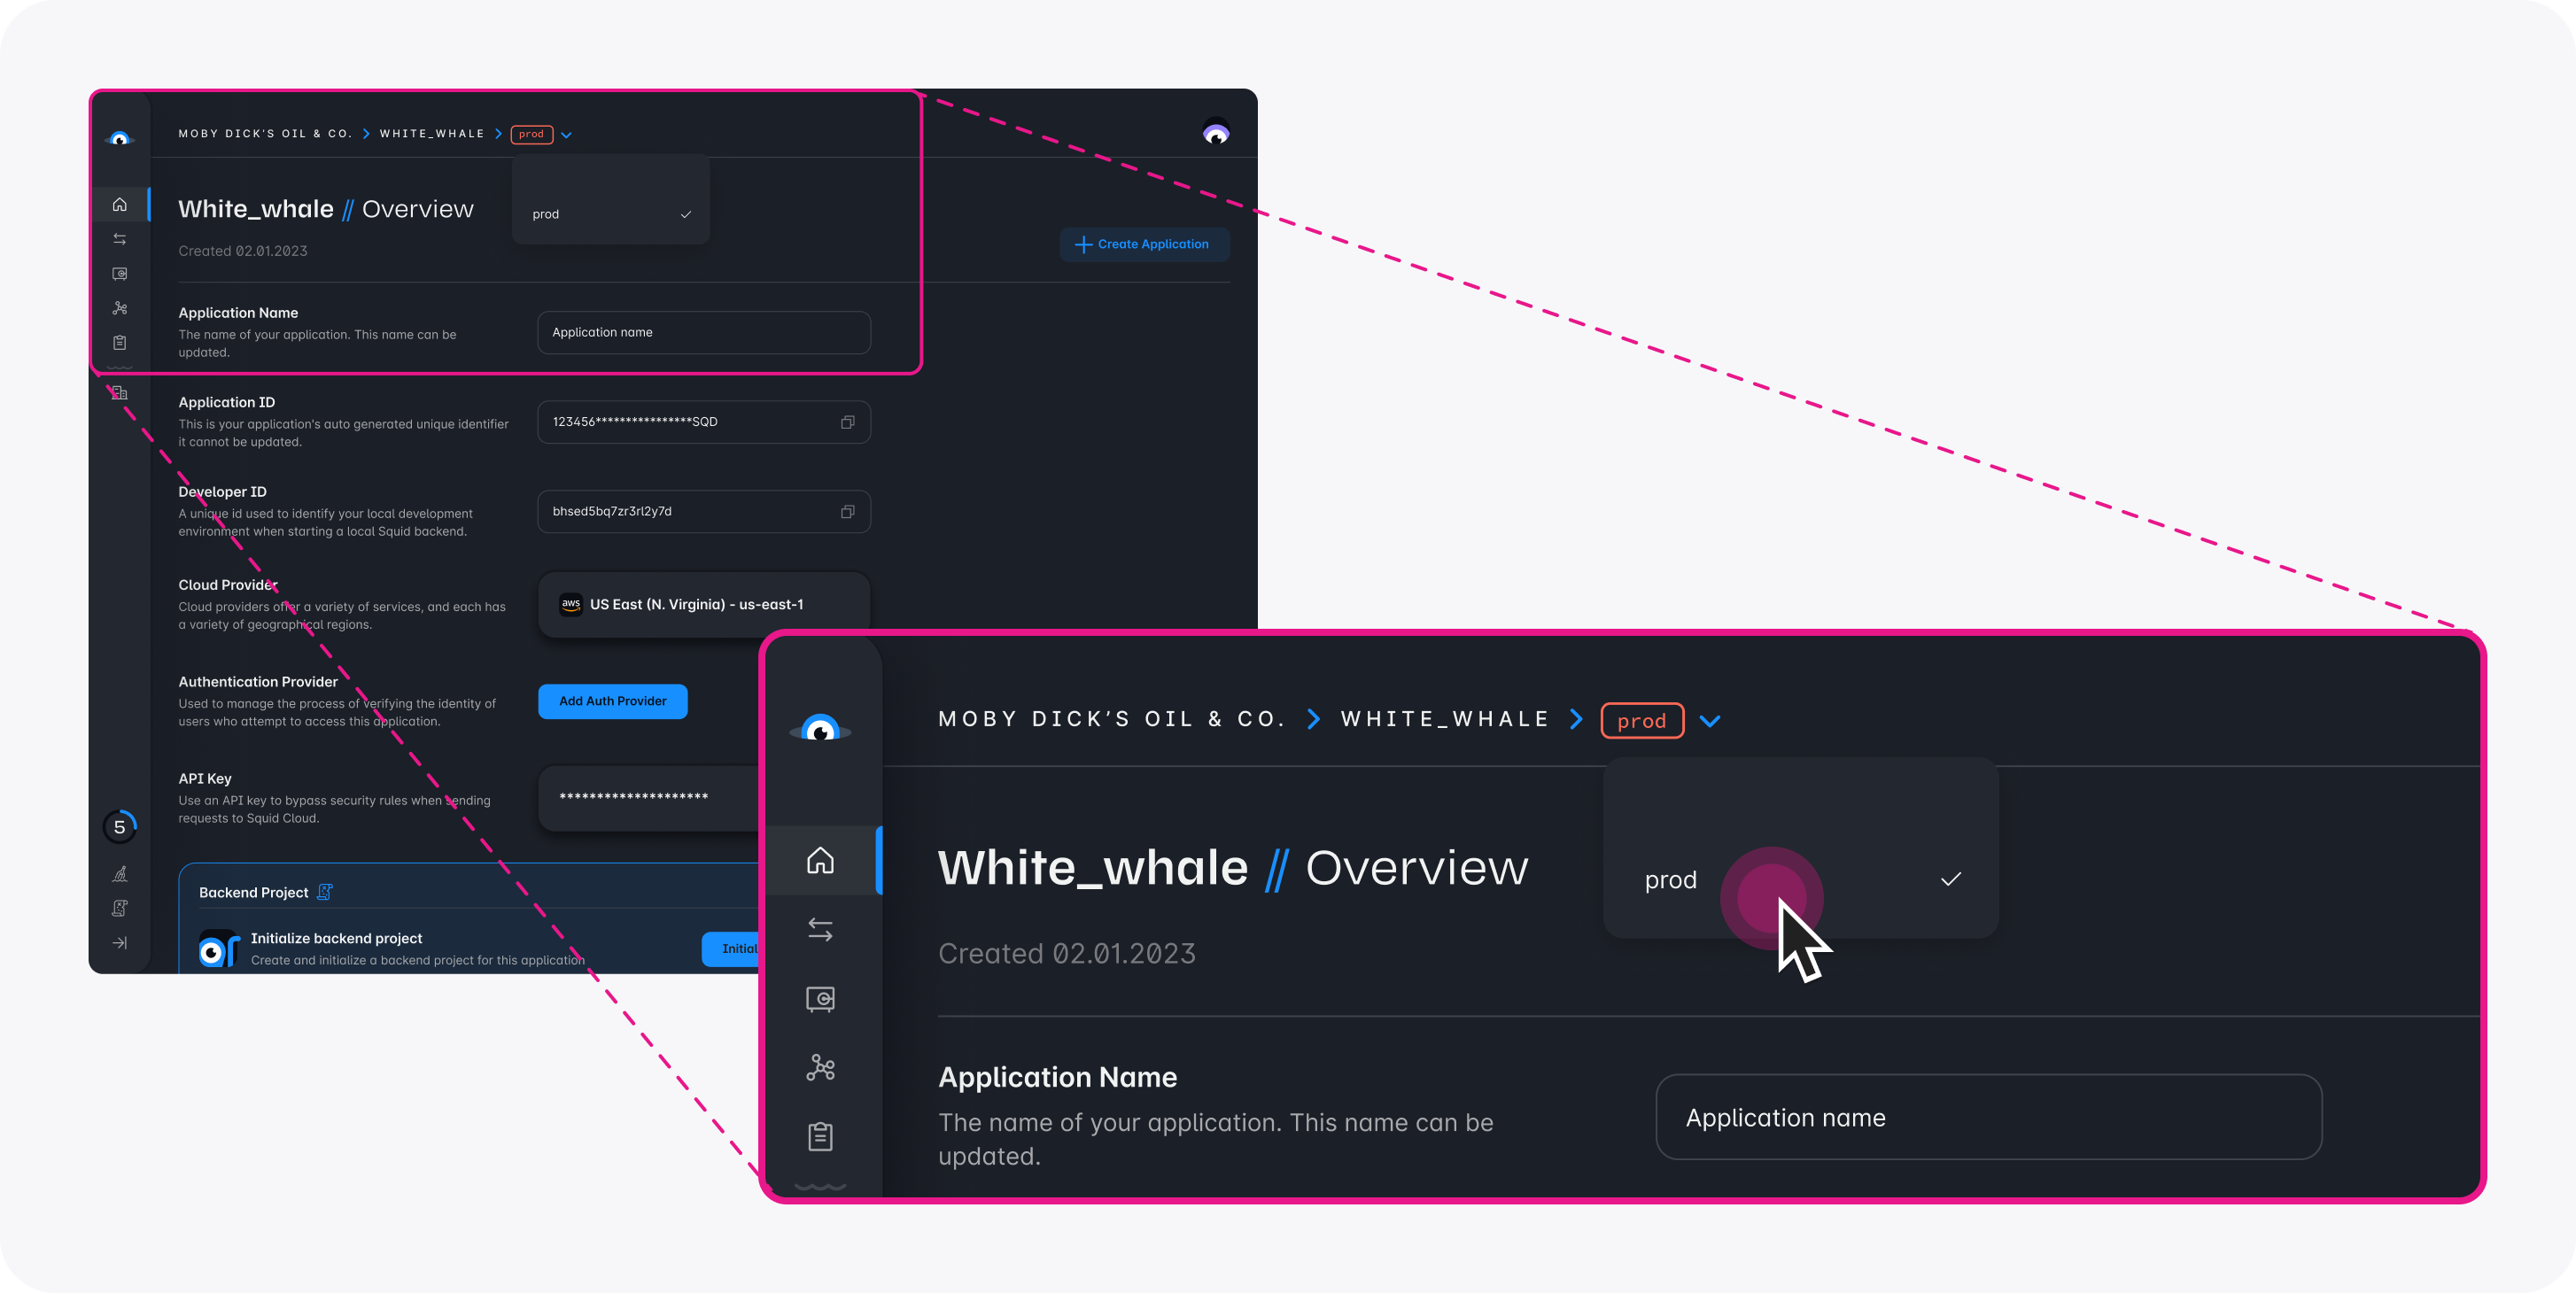
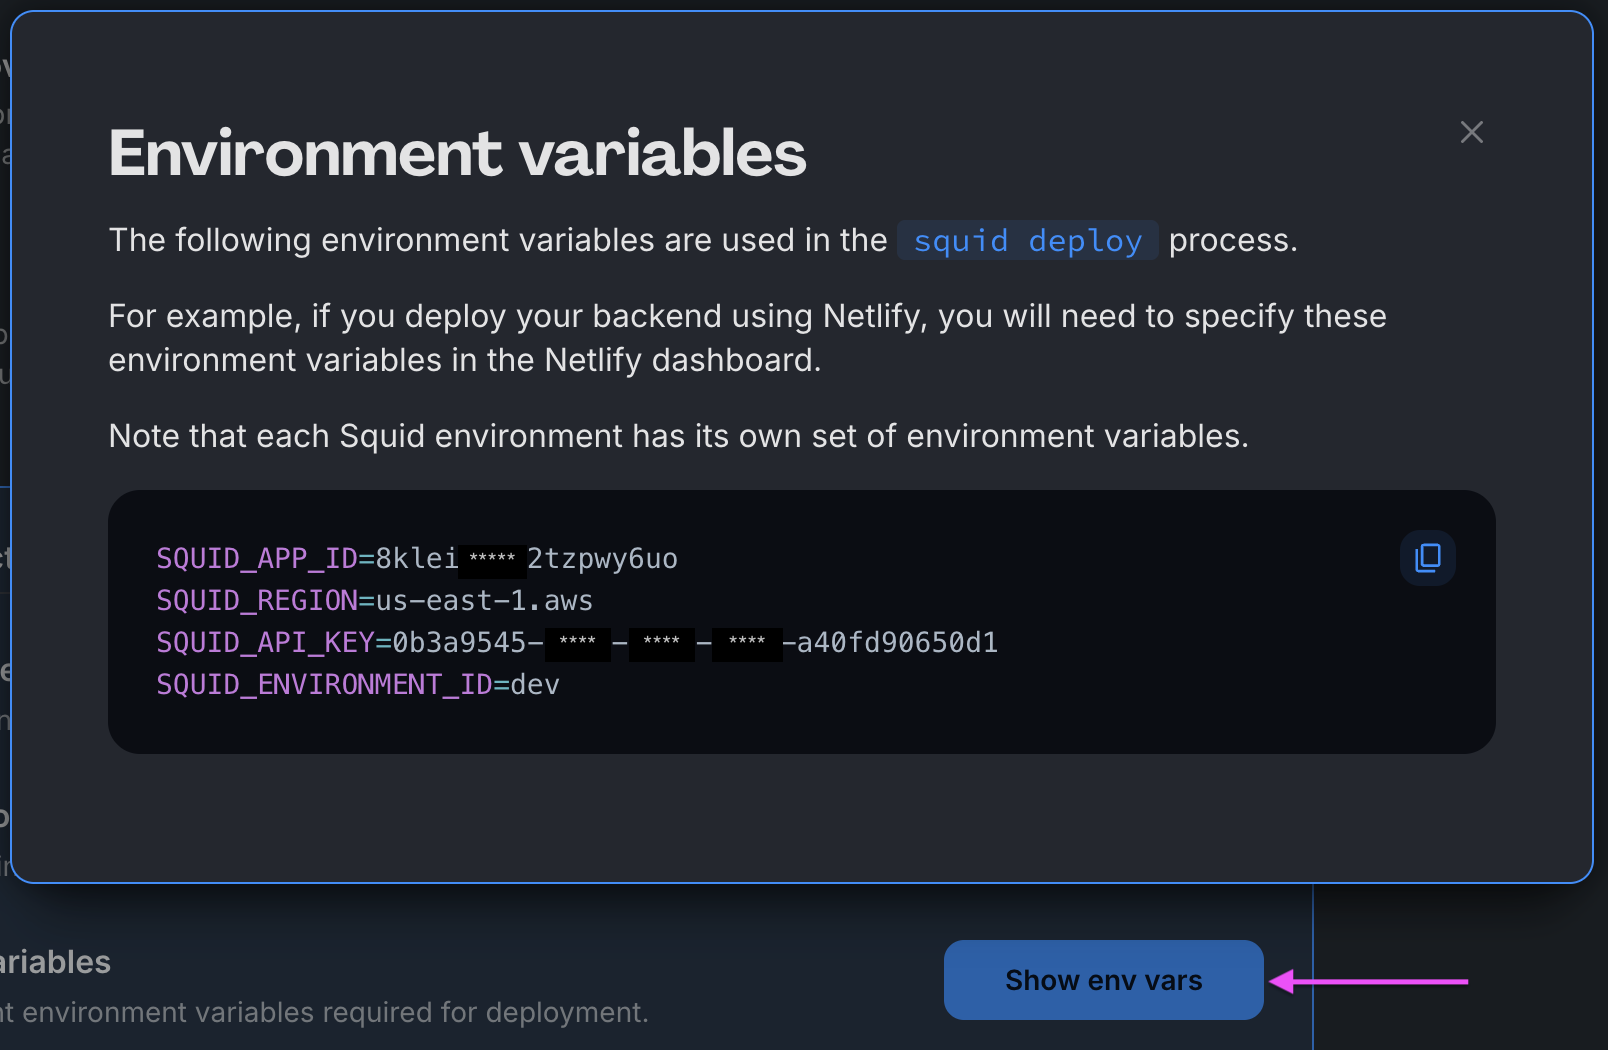
Download the snowflake code sample using the following command. Replace the placeholders with the values from your Squid application as shown in the console.
npx @squidcloud/cli init-sample snowflake --template snowflake --appId YOUR_SQUID_APP_ID --apiKey YOUR_SQUID_API_KEY --environmentId dev --squidDeveloperId YOUR_SQUID_DEVELOPER_ID --region YOUR_REGION
You can find your environment variables under: 'Application' -> 'Show env vars' as seen below:
- Open the project in the IDE of your choice.
- Start the app locally by running the following command in the project folder:
npm run start
- To view the app, navigate to localhost:PORT, where PORT is logged in the terminal. The address will likely be
http://localhost:5173.
新しい Snowflake Database を作成する
Snowflake は account 作成時に複数の shared database を提供します。これらの database は read-only のため、編集できる copy を作成します。
Snowflake console で Snowflake Worksheet に移動して開きます。Worksheet で Run all option を使用し、以下の command を実行します。<your_wh> を data warehouse の name に置き換えます。
USE WAREHOUSE <your_wh>;

CREATE DATABASE SQUID_TUTORIAL;

CREATE TABLE SQUID_TUTORIAL.PUBLIC.ORDERS LIKE "SNOWFLAKE_SAMPLE_DATA"."TPCH_SF1"."ORDERS";

INSERT INTO SQUID_TUTORIAL.PUBLIC.ORDERS SELECT * FROM "SNOWFLAKE_SAMPLE_DATA"."TPCH_SF1"."ORDERS";
これらの command は、新しい database を作成し、sample table の 1 つから新しい database に data を import します。
Snowflake を Squid に接続する
- Integrations tab をクリックし、次に Available integrations をクリックしてすべての integration を表示します。
- Snowflake integration を選択します。
- 次の configuration information を指定します。
field は case-sensitive です。必要な場合は uppercase を使用していることを確認してください。
-
Integration ID: snowflake-shop
-
Snowflake username
-
Snowflake password - private に保つため、password は Squid Secrets に保存します。
-
Snowflake account ID - Snowflake console で username が表示されている隅の menu を開き、menu から Account option をクリックします。account に hover すると、完全な account information を表示する option を持つ modal が表示されます。Snowflake の Copy account identifier button を使用して ID を copy できます。Squid Console でこの ID を paste し、. を - に置き換えます。result は次のようになります。
Before: AAAAAAA.AAA00000
After: AAAAAAA-AAA00000 -
Snowflake database name: SQUID_TUTORIAL
-
Snowflake schema: PUBLIC
-
Snowflake warehouse - 前の step で database を作成した warehouse と同じものを使用します。
-
Snowflake role - Snowflake database が存在する role の name。Snowflake console で Snowflake username の下にある Snowflake role を確認できます。
connection information の入力後、Test connection をクリックして connection が成功することを確認します。
-
Add integration をクリックして integration を追加します。
-
schema は Snowflake から Squid に自動 sync されます。各 collection には、collection(table)内の individual document(row)を識別する primary key が必要です。
-
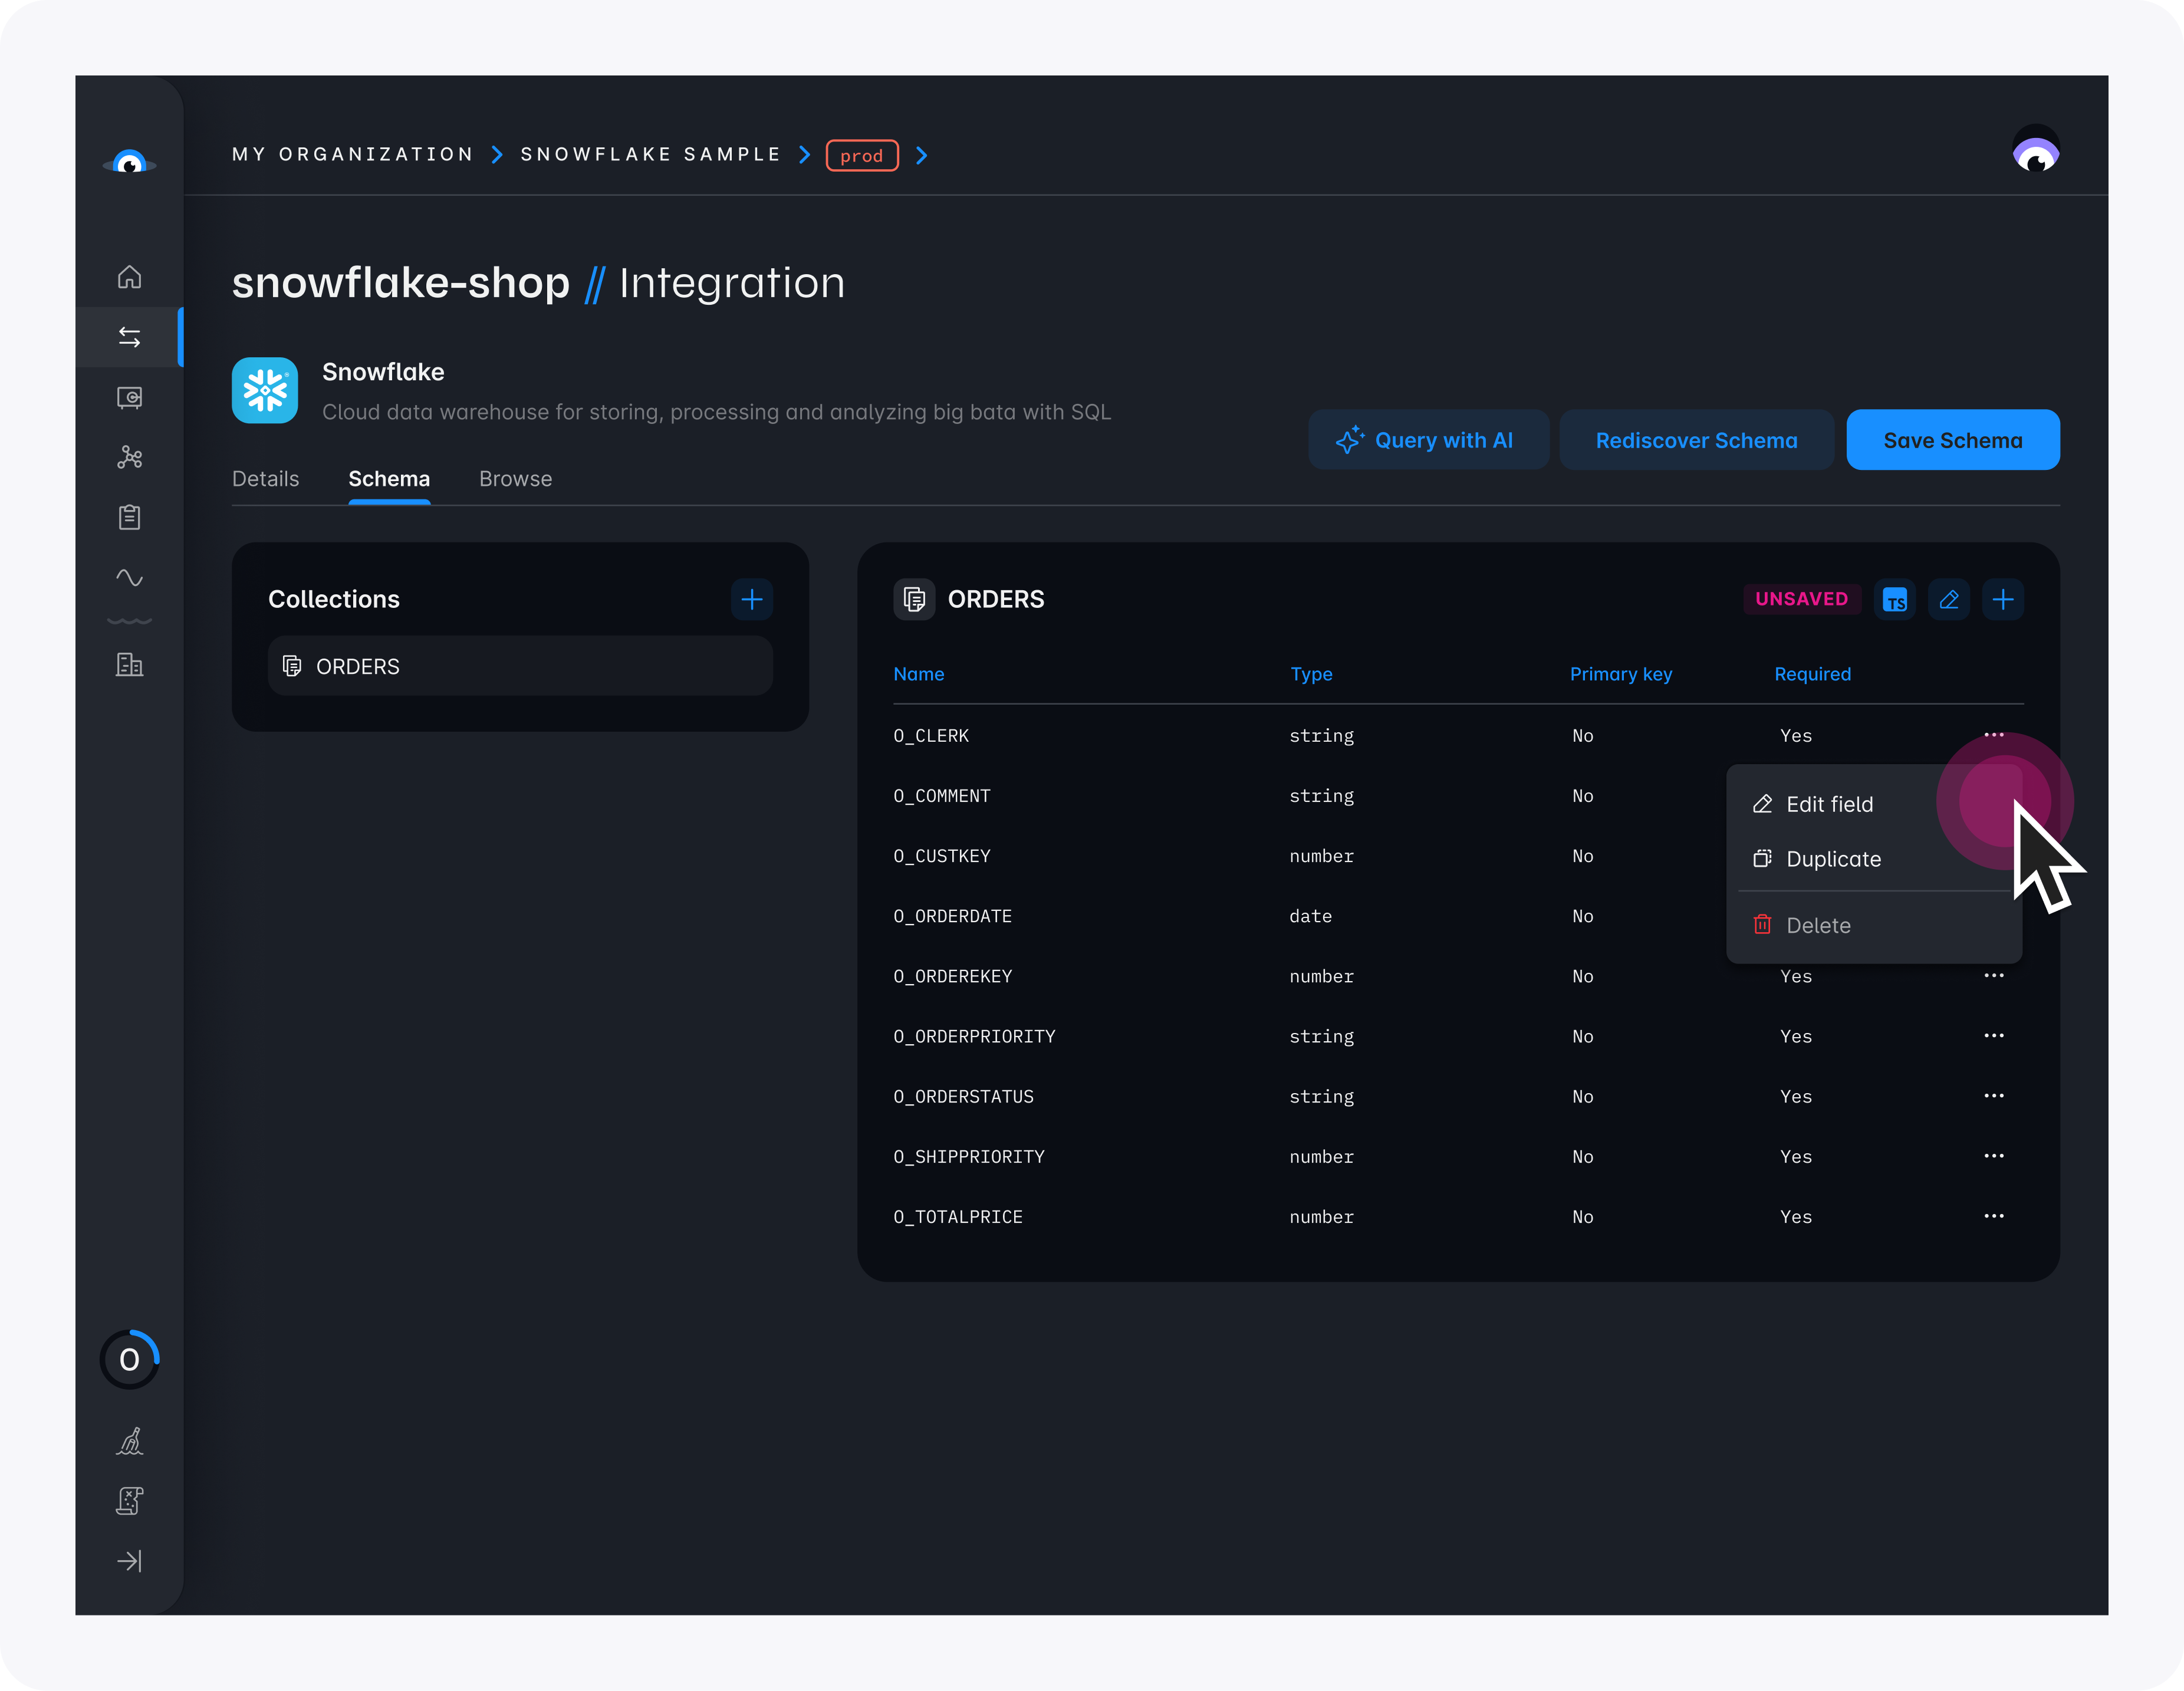
Squid Console schema preview の ORDERS collection で、O_ORDERKEY row の ... button をクリックし、Edit field を選択します。
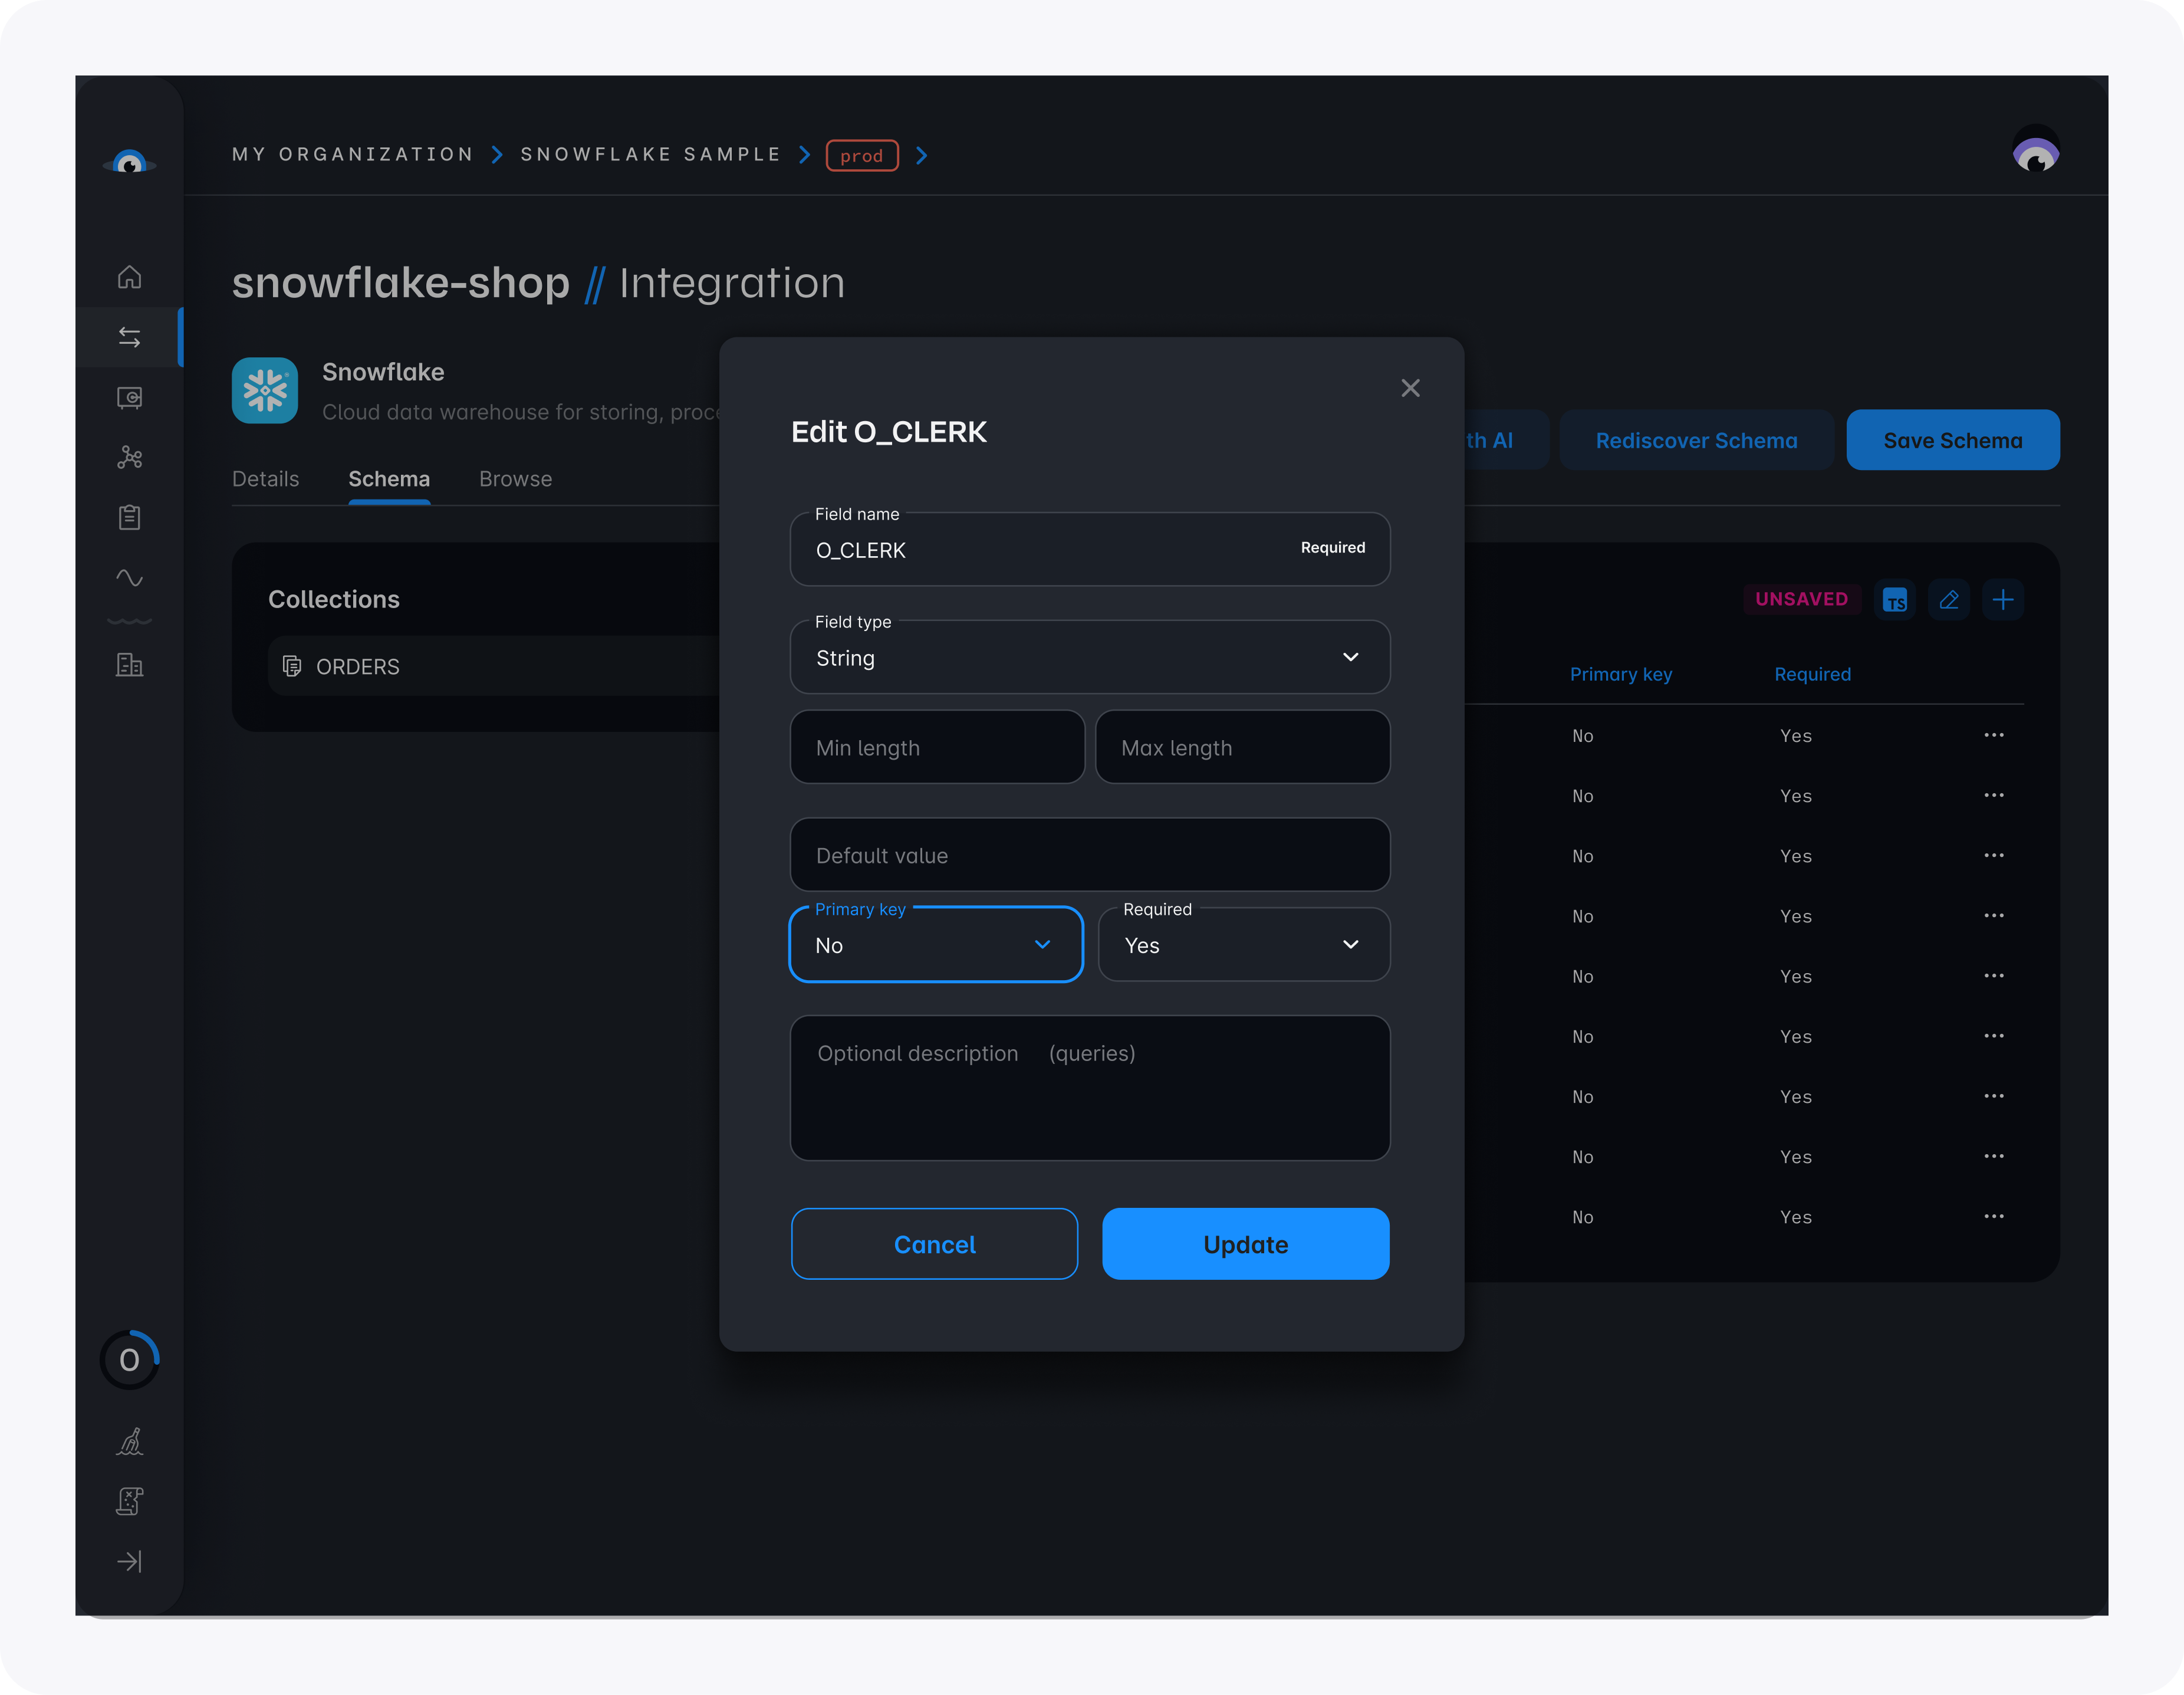
- Primary key で、dropdown menu から Yes を選択します。
- Save schema をクリックして、discover した schema を保存します。
Security Rule
すべての database integration には security rule が必要です。これにより、specific collection または action、そして database 全体への access を authorize する custom logic を作成できます。authentication と authorization はこの tutorial の scope 外であるため、backend code には snowflake integration への public access を許可する security rule が含まれます。
data の保護について詳しくは、Squid backend の security ruleを参照してください。
security rule は backend/src/service/example-service.ts file にあります。SquidService class に decorator を追加すると security rule を拡張できます。database integration の security rule を作成するには、database action type と INTEGRATION_ID を parameter に取る @secureDatabase decorator を使用します。ExampleService class で current security rule を確認できます。
export class ExampleService extends SquidService {
  @secureDatabase('all', 'snowflake-shop')
  allowAllAccessToSnowflakeDb(): boolean {
    return true;
  }
}
App をローカルで実行する
- Start the Squid backend locally using the following command in the terminal opened to your app's backend:
squid start
- Start the frontend using the following command in the terminal opened to your app's frontend:
npm run dev
- To view the app, navigate to localhost:PORT where PORT is logged in the terminal. The address will likely be
http://localhost:5173.
App の Functionality を確認する
- frontend に表示される table で、query に一致するすべての document を確認できます。以下の Squid hook は data を read し、その data は
DisplayOrderscomponent によって表示されます。
  const ordersCollection = useCollection<Order>('ORDERS','snowflake-shop');
  const { data } = useQuery(
    ordersCollection
      .query()
      .eq('O_CUSTKEY', 121361)
      .dereference()
  );

  ...

    return (
    <div>
      <h1>Orders</h1>
      {data && <DisplayOrders orders={data} />}
      <AddOrder />
    </div>
  );
- Add order をクリックすると、新しい order が random に生成されて database に追加されます。この order が real-time で view に表示されることに注目してください。Squid は Snowflake database との real-time sync を可能にします。
これで完了です!
おめでとうございます!Snowflake database を Squid に接続し、Squid security functionality を使用して client application から read と write を管理しました。Snowflake やその他 integration で Squid ができることはさらに多くあります。Squid Client SDK documentationで mutation や query などの database feature を確認するか、Squid AI を使用して data に query を実行する こちらの tutorialを試してください。