AI で Data を Query する
Squid AI の Query with AI feature を使用して、data に関する information を real-time に取得します。
構築するもの
- healthcare data について質問できる app。
- data は random に生成され、Squid の built-in database に保存されます。
学ぶこと
- data について質問するための Squid
executeAiQuerymethod の使用方法。 - client が backend と interface できるようにする executable function の構成。
TypeScript のある程度の experience が必要です。React の experience があると役立ちますが、必須ではありません。
この tutorial で collaboration していただいた Otairo の partner に心より感謝します!
Environment Setup
- In the Squid Console, switch to the
devenvironment.
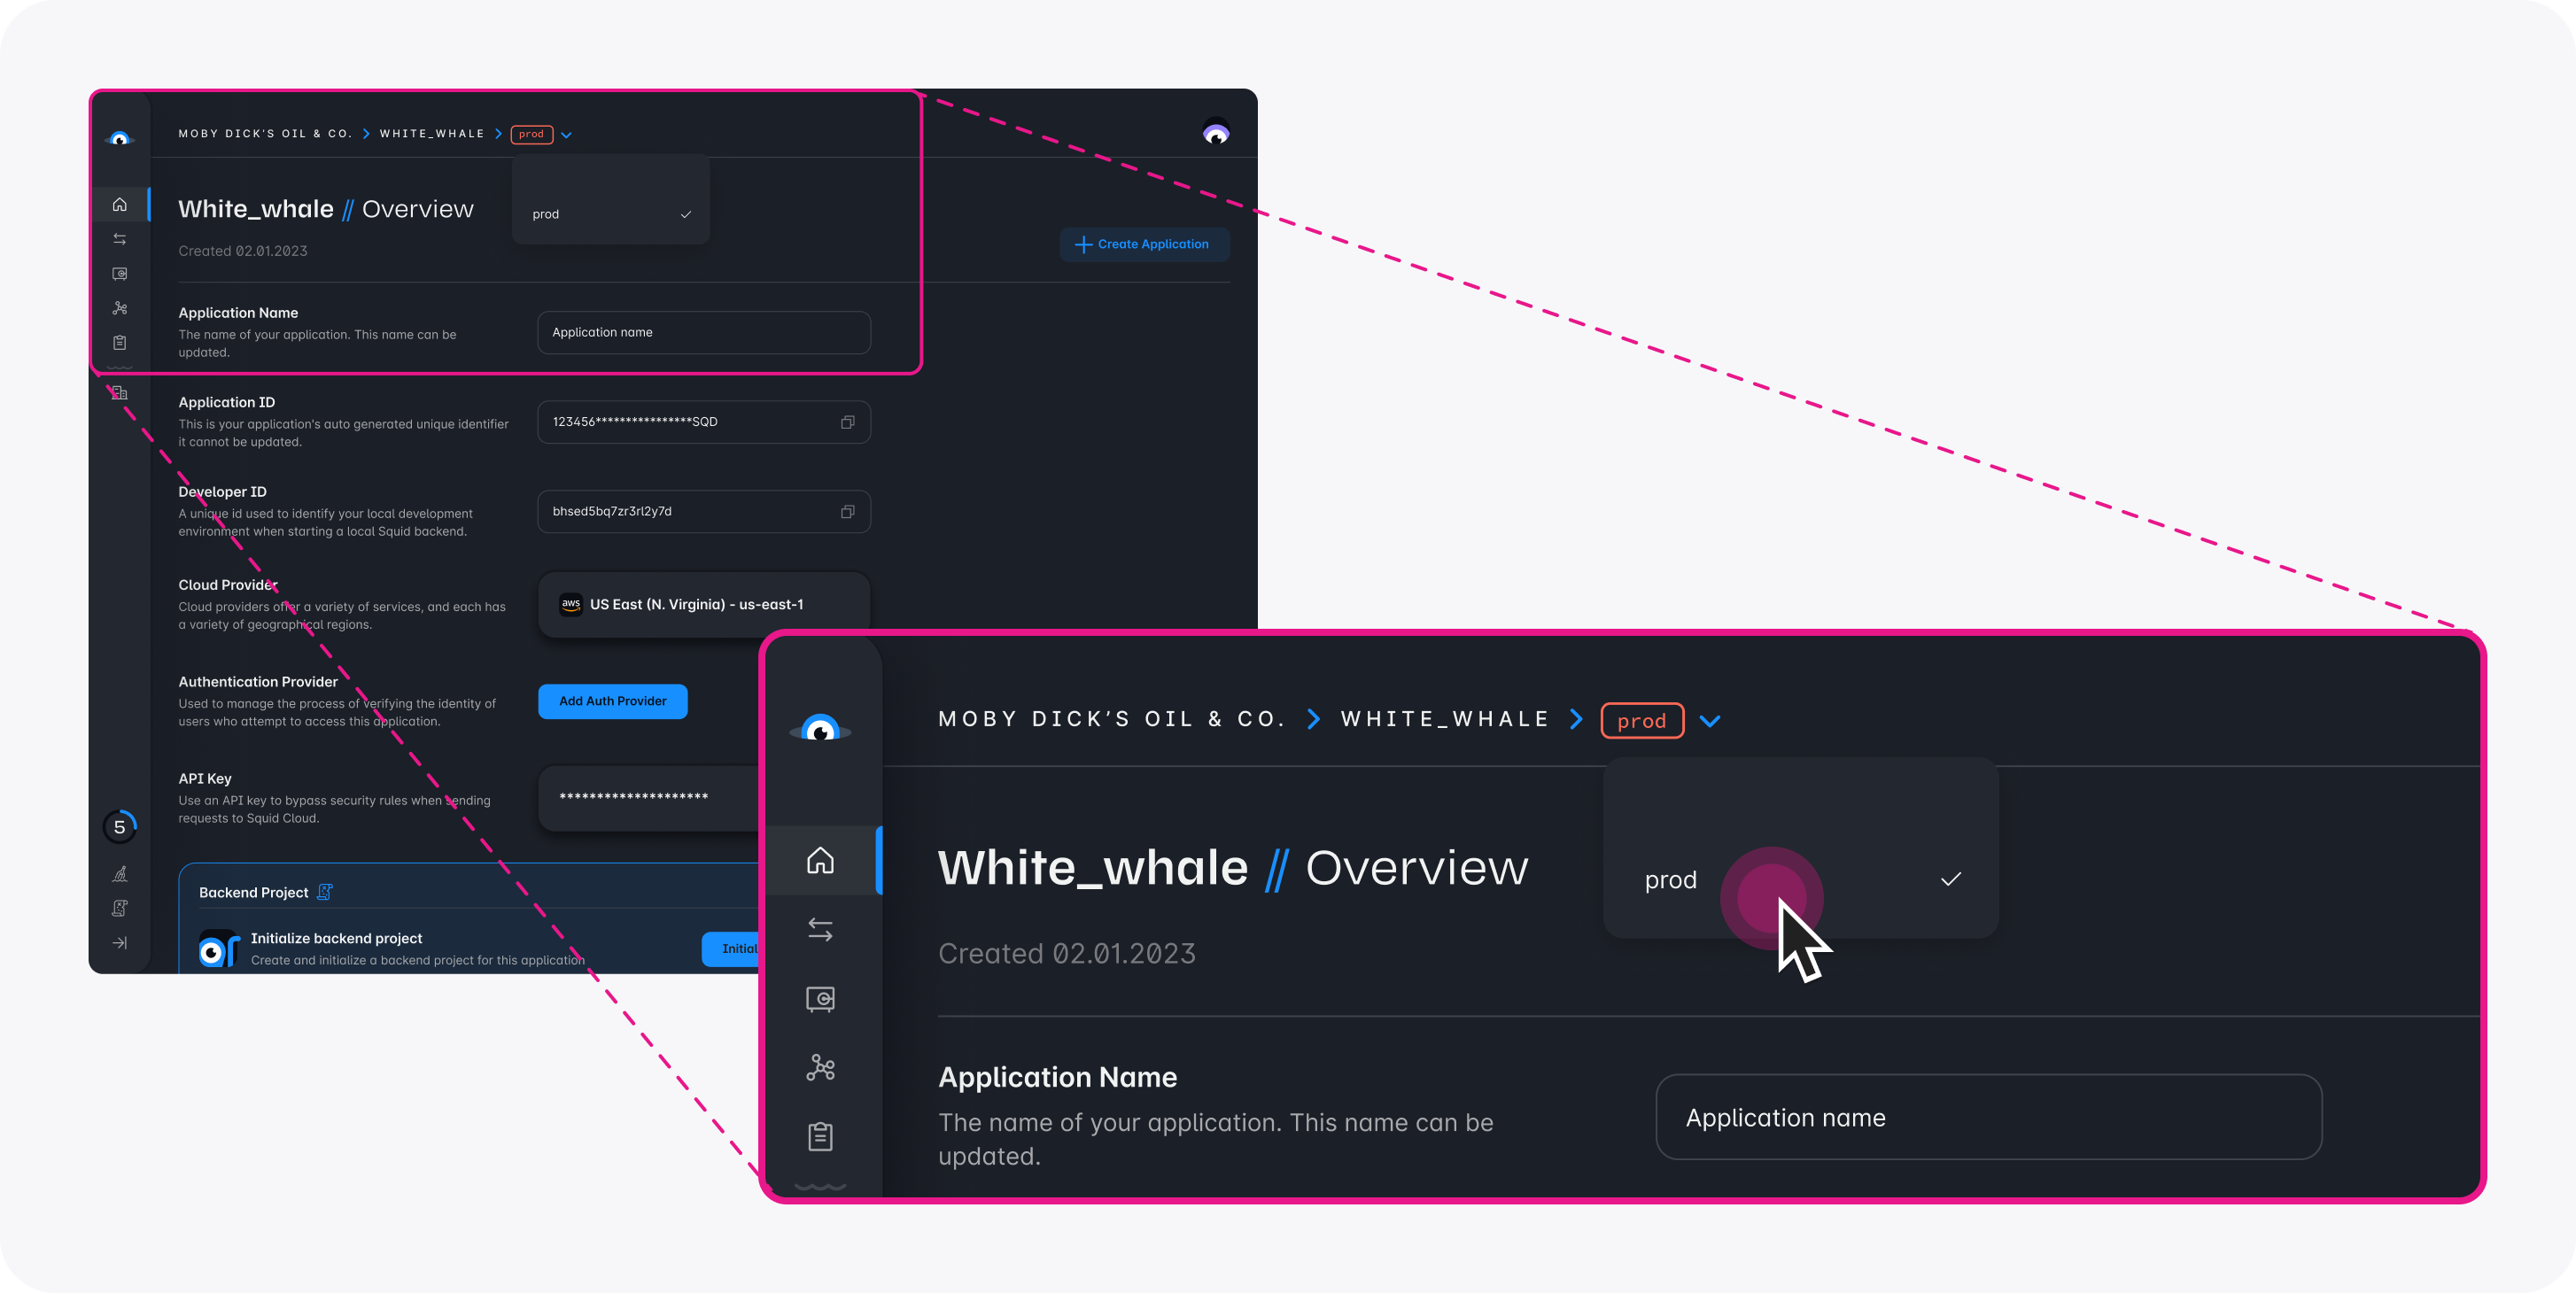
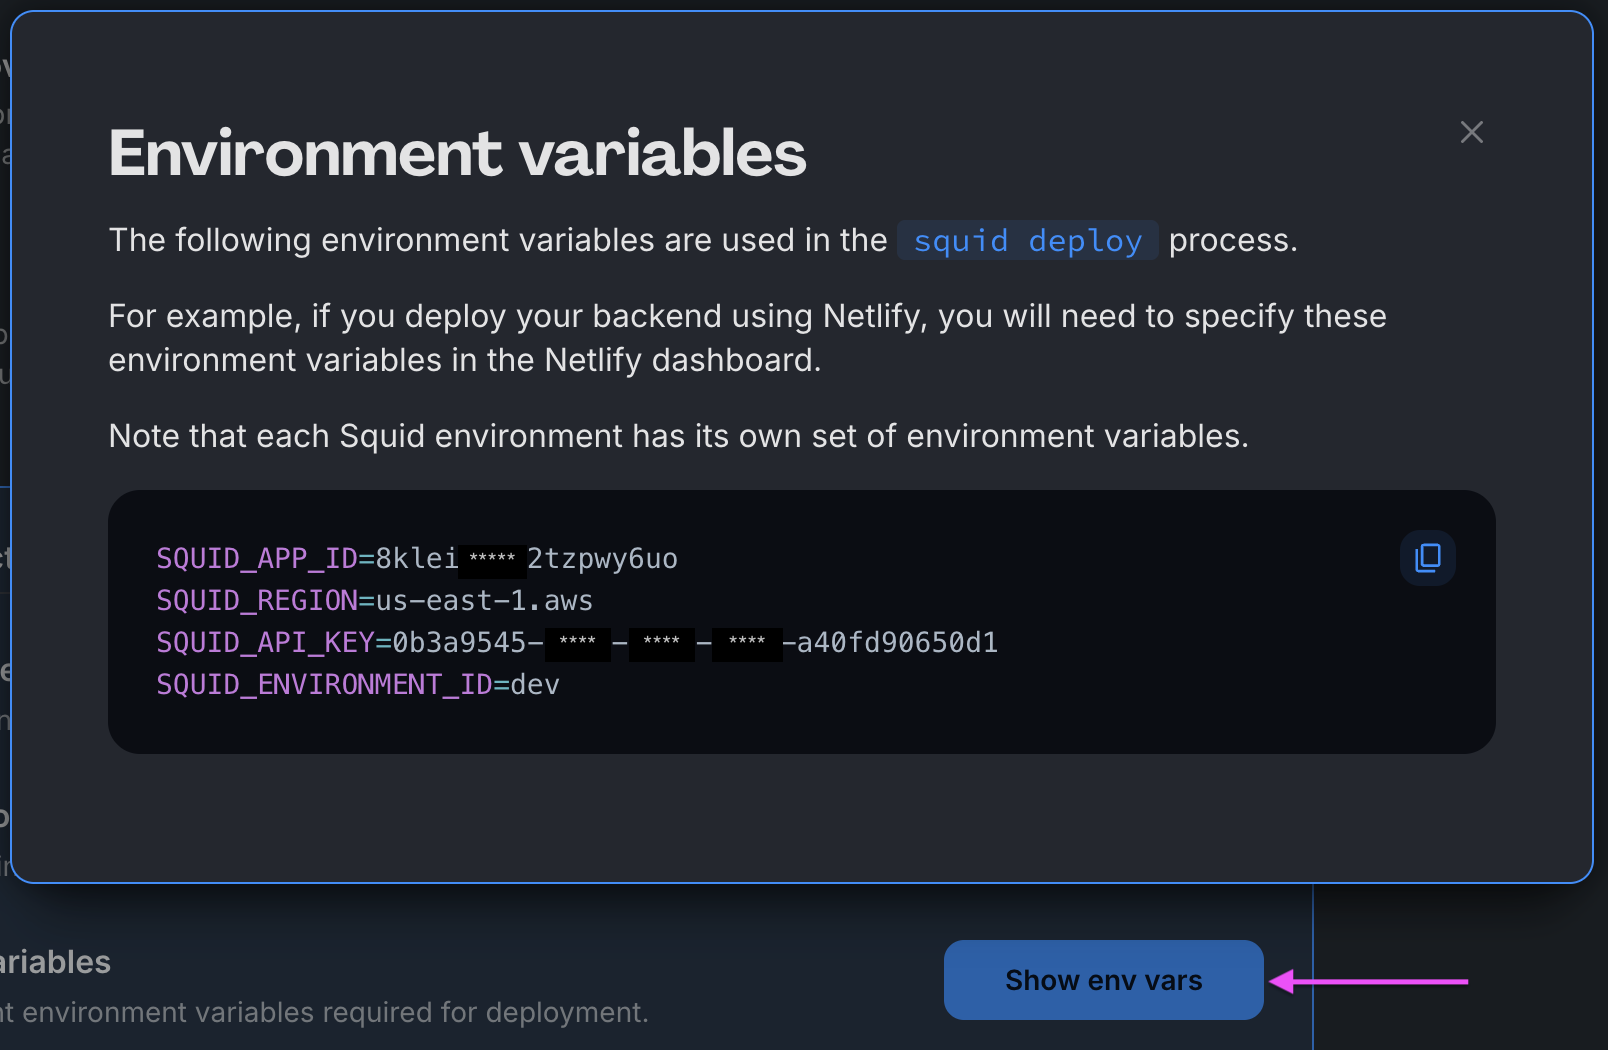
Download the ai-for-data code sample using the following command. Replace the placeholders with the values from your Squid application as shown in the console.
npx @squidcloud/cli init-sample ai-for-data --template ai-for-data --appId YOUR_SQUID_APP_ID --apiKey YOUR_SQUID_API_KEY --environmentId dev --squidDeveloperId YOUR_SQUID_DEVELOPER_ID --region YOUR_REGION
You can find your environment variables under: 'Application' -> 'Show env vars' as seen below:
- Open the project in the IDE of your choice.
- Start the app locally by running the following command in the project folder:
npm run start
- To view the app, navigate to localhost:PORT, where PORT is logged in the terminal. The address will likely be
http://localhost:5173.
App の Functionality を確認する
-
Add mock data button をクリックし、random に生成された data を database に追加します。data は real-time で client に sync されるため、追加されたことを確認できます。
-
Squid Console で、app の Connectors tab をクリックします。
-
built_in_db connector の
...をクリックし、dropdown から Schema を選択します。 -
次に、schema の collection と field に description を追加します。これにより Squid AI は data をよりよく理解し、question により正確な answer を提供できます。
health_datacollection の pencil button をクリックします。collection description に以下を追加します。
Each document contains patient information regarding their age, patient ID, and their medical diagnosis.
agefield の...button をクリックして、dropdown menu から Edit field を選択します。以下の description を追加してから、Update をクリックします。
The age of the patient
diagnosisfield の...button をクリックして、dropdown menu から Edit field を選択します。以下の description を追加してから、Update をクリックします。
The patient's medical diagnosis
patentIdfield の...button をクリックして、dropdown menu から Edit field を選択します。以下の description を追加してから、Update をクリックします。
The patient's ID
-
Save schema をクリックします。これにより Squid AI に schema と description が提供され、data に対する query の作成方法を理解できるようになります。
-
sample app で、chatbot に data について question を尋ねます。Squid AI は prompt に基づいて database query を自動生成します。以下の質問例を試してください。
- flu と diagnosis された person は何人ですか?
- 50 歳を超える person の中で、最も common な diagnosis は何ですか?
- asthma と diagnosis された patient の average age はいくつですか?
Code の内訳
Backend で AI Query を実行する
Squid backend の data-ai-service.ts file には、@executable decorator を持つ class があります。Squid の executable は、server 上で実行される function を client に提供します。
executable は client から直接 access でき、backend resource と secret への unlimited permission を持ちます。したがって、authorized user のみが executable を実行できることを確保するため、特に注意する必要があります。
executeAiQuery method は database の connector ID と question を parameter として受け取り、Squid AI response に resolve する promise を返します。詳細については、AI query documentationを参照してください。
export class SquidAiDataService extends SquidService {
  @executable()
  async askQuestion(question: string): Promise<AiResponse> {
    const aiResponse = await this.squid.ai().executeAiQuery('built_in_db', question);
    return {
      author: 'ai',
      answer: aiResponse.answer,
      executedQuery: aiResponse.executedQuery,
      explanation: aiResponse.explanation,
    };
  }
}
Client で Question を尋ねる
frontend では、client は executeFunction method を使用して backend に question を渡します。executable function の name とその function の parameter を渡します。
squid.executeFunction('askQuestion', question).then((response) => {
    // Handle the response
}
これで完了です!
おめでとうございます!Squid AI 上で実行される chatbot を使用して、data に関する question に answer する web app を正常に構築・実行できました。次に試すこと:
- お気に入りの database で Squid を使用する。利用可能な database connector を確認する。
- Squid AI でほかにできることを確認する!
- この tutorialで AI agent を作成・保護する。
Additional Note
Squid Environment
- Squid は 2 つの異なる target environment を提供します。development 用の
devと production 用のprodです。この tutorial ではdevenvironment を使用します。詳細については、Squid の environmentを参照してください。 - Squid developer ID は、project をローカルで実行する場合にのみ使用されます。
Squid Functionality
- Squid built-in database を使用する場合、Squid backend は追加の customization なしで完全に機能します。Scheduler、database event に response する Trigger、raw SQL または database-specific query を実行する native query などの feature を Squid backend に追加することもできます。すべての option を確認するには、Backend SDK docsを参照してください。
- built-in database は document-based であるため、notes collection は document の collection を表します。SQL database を使用する場合、collection は table を表し、document は table の row です。