Squid で Firebase Auth を使う
Firebase Authentication を使用して Squid アプリを安全に保護する
作成するもの
- Firebase Authentication を使用してアプリの認証を処理するフルスタックアプリケーション。
- Firebase Authentication トークンに基づいてデータベースアクセスを認可する Squid バックエンド。
学べること
- Firebase Auth を Squid と統合して、リソースへのアクセスを管理する方法。
必要なもの
- Squid アプリ。Squid Console で新しいアプリを作成できます。
- Firebase アプリ。Firebase Console でアプリを作成するか、既存のアプリを確認できます。
- TypeScript の経験があること。React の経験があると便利ですが、必須ではありません。
環境セットアップ
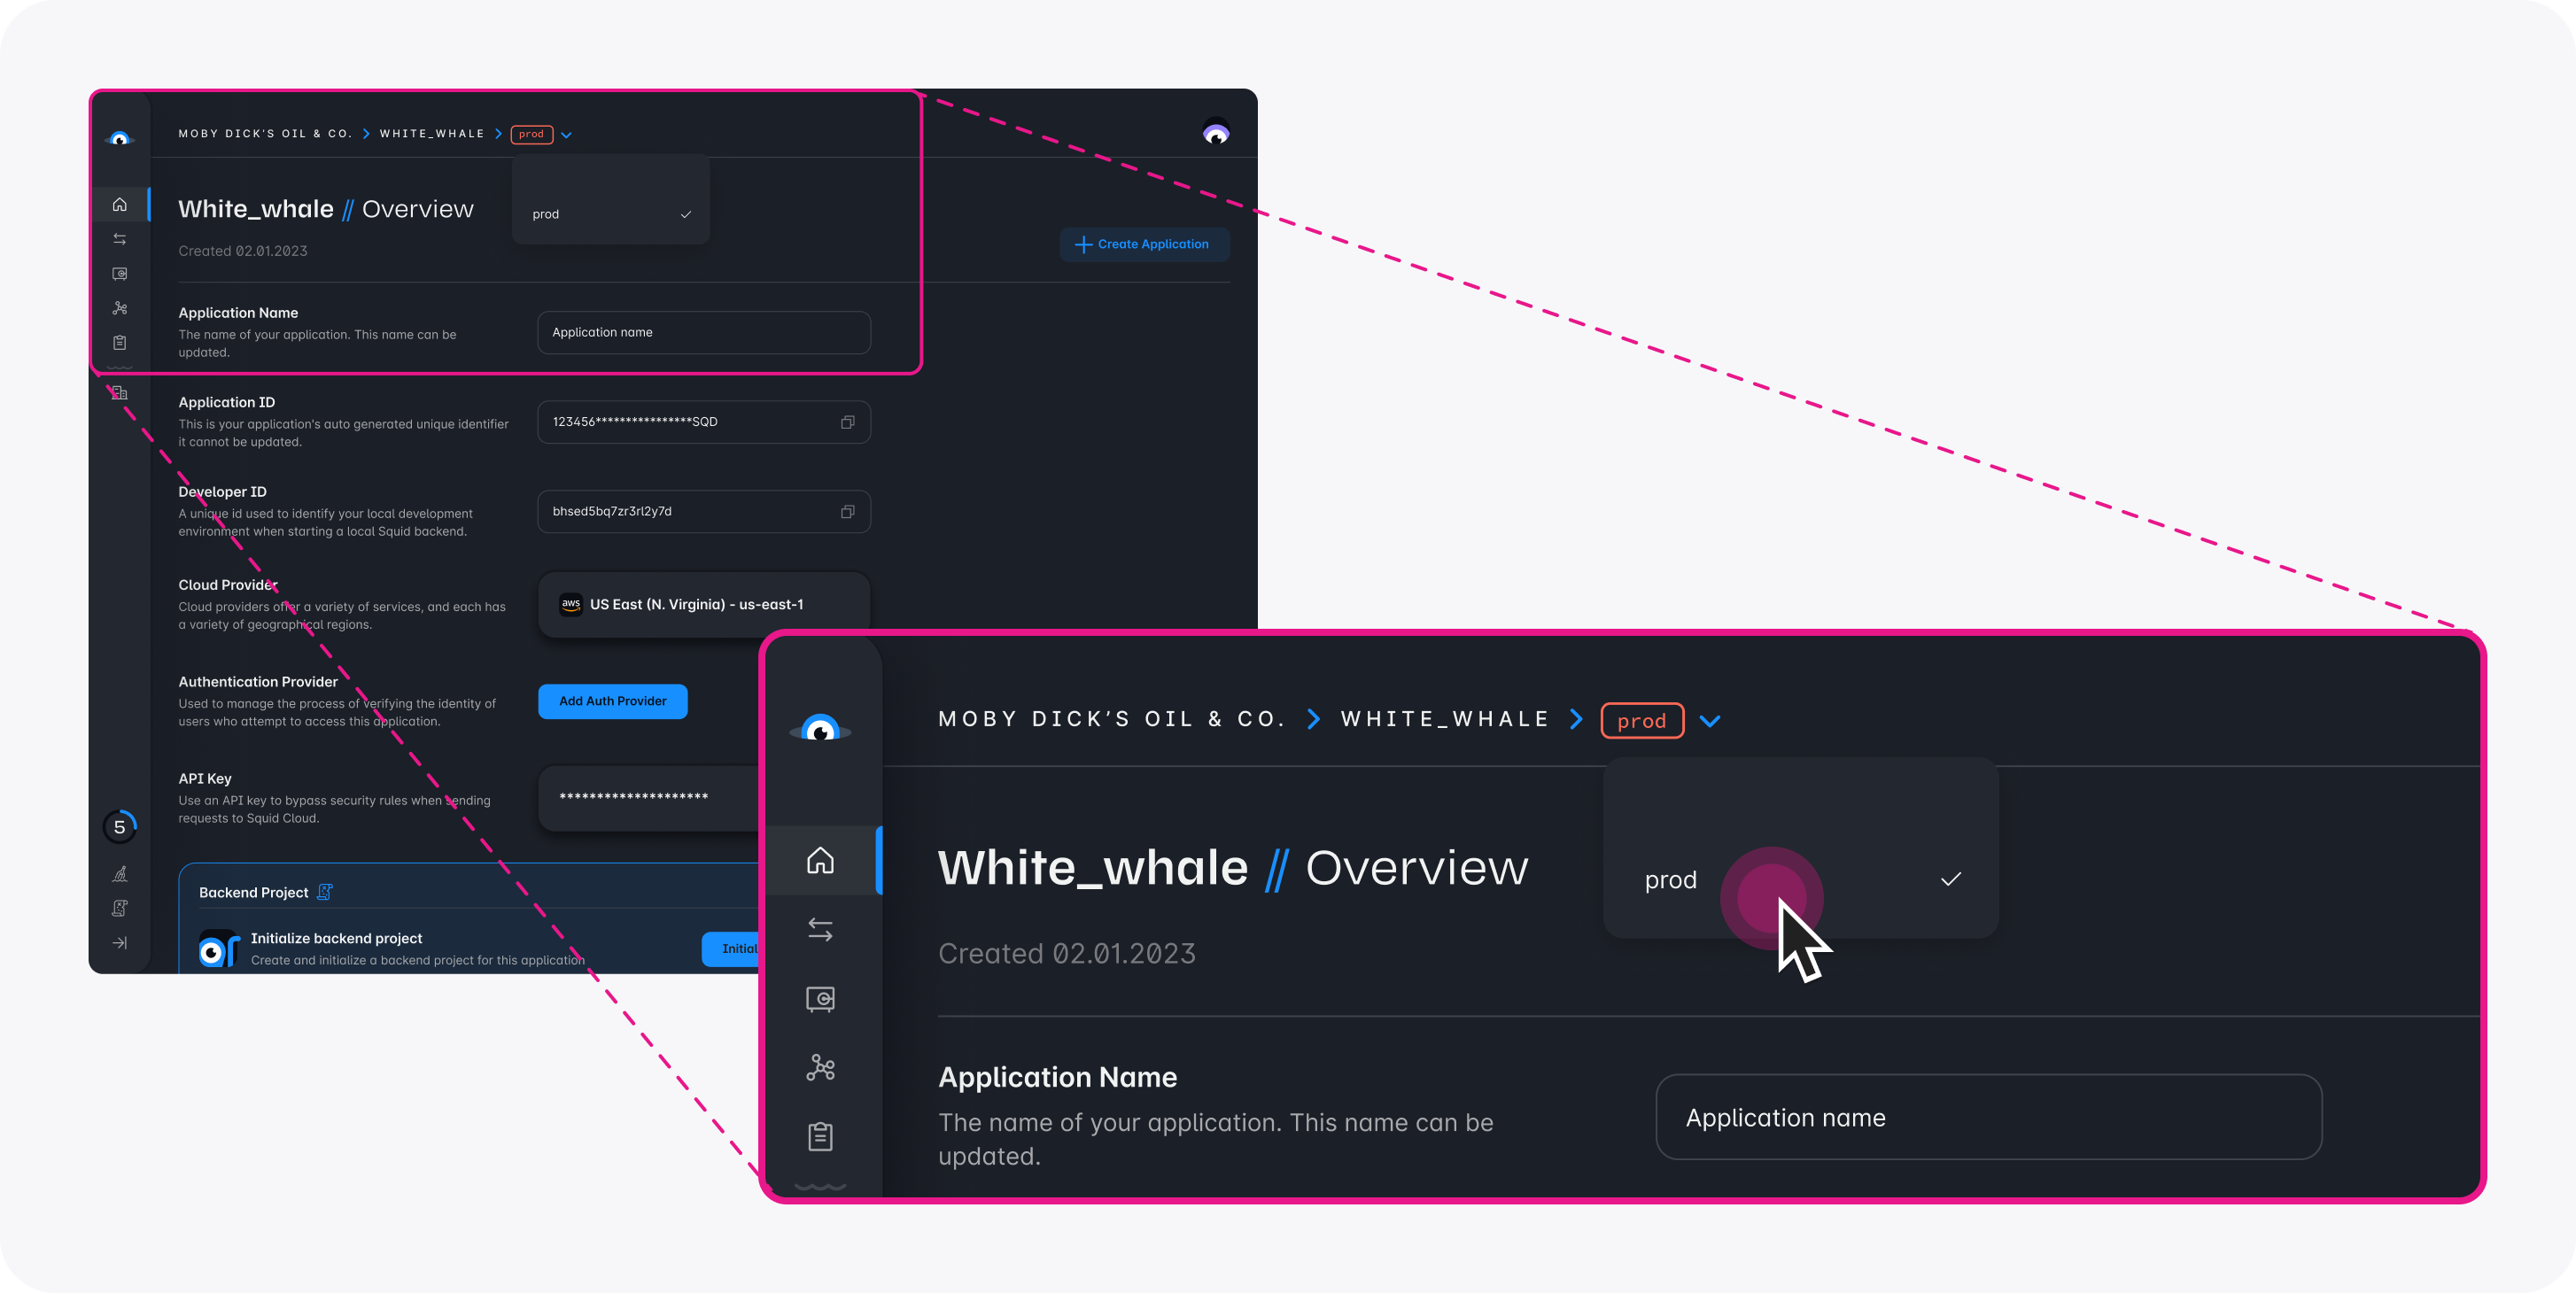
- In the Squid Console, switch to the
devenvironment.
Download the firebase-authentication code sample using the following command. Replace the placeholders with the values from your Squid application as shown in the console.
npx @squidcloud/cli init-sample firebase-authentication --template firebase-authentication --appId YOUR_SQUID_APP_ID --apiKey YOUR_SQUID_API_KEY --environmentId dev --squidDeveloperId YOUR_SQUID_DEVELOPER_ID --region YOUR_REGION
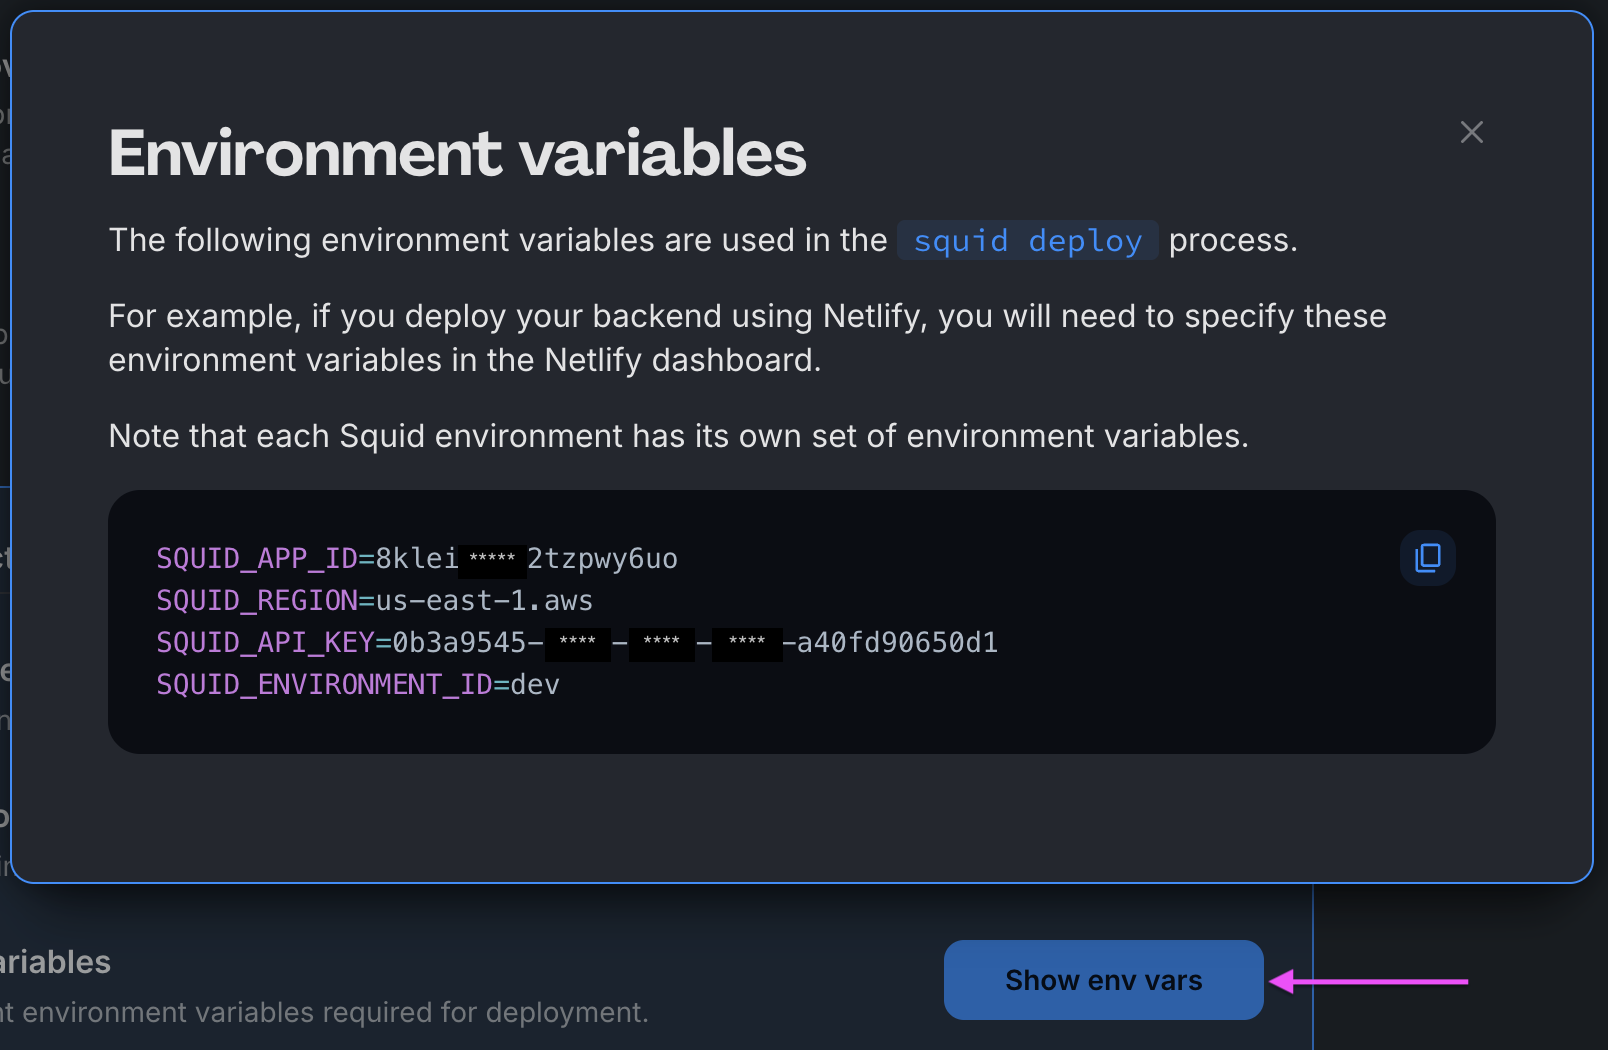
You can find your environment variables under: 'Application' -> 'Show env vars' as seen below:
- Open the project in the IDE of your choice.
- Start the app locally by running the following command in the project folder:
npm run start
- To view the app, navigate to localhost:PORT, where PORT is logged in the terminal. The address will likely be
http://localhost:5173.
Firebase Authentication 統合を追加する
-
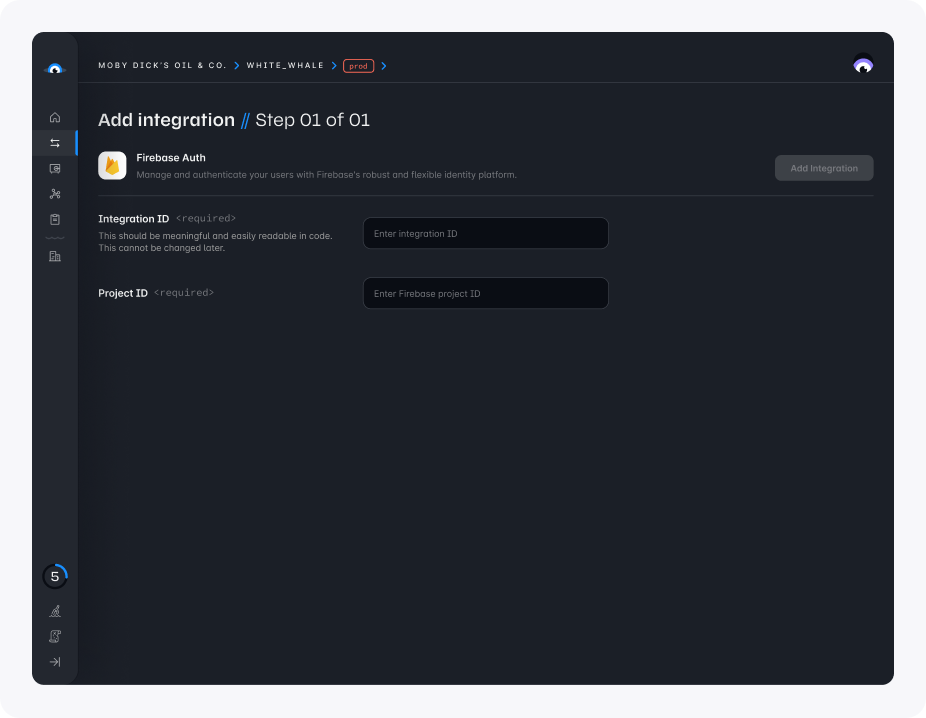
Squid Console で、Integrations タブをクリックします。
-
Available integrations タブから Firebase Authentication を選択します。
-
次の詳細を入力します。
- Integration ID:
firebase-auth - Project ID: Firebase プロジェクトの一意の識別子です。Firebase Console でプロジェクト ID を確認できます。
- Add integration をクリックします。
Firebase Authentication 統合を追加したら、authentication ドキュメントを確認して、アプリで Firebase Authentication を Squid と一緒に使う方法を確認してください。
react-firebase-hooks は、Firebase によってメンテナンスされていないサードパーティパッケージです。このパッケージを使用しない選択もできますが、その場合は、認証トークンを最新の状態に保つための可観測性(observability)を扱うコードを自分で書いてメンテナンスする必要があります。
Firebase を初期化する
サンプルアプリで、フロントエンドの src ディレクトリにある firebase.ts ファイルに移動します。プレースホルダーを、Firebase アプリの情報で更新します。
// Import the functions you need from the SDKs you need
import { initializeApp } from 'firebase/app';
import { getAuth } from 'firebase/auth';

// TODO: Add SDKs for other Firebase products that you want to use
// https://firebase.google.com/docs/web/setup#available-libraries
// Your web app's Firebase configuration

const firebaseConfig = {
  apiKey: 'YOUR_FIREBASE_API-KEY',
  authDomain: 'YOUR_FIREBASE_PROJECT_ID.firebaseapp.com',
  projectId: 'YOUR_FIREBASE_PROJECT_ID',
  appId: 'YOUR_FIREBASE_APP_ID',
};

// Initialize Firebase
const firebaseApp = initializeApp(firebaseConfig);
export const auth = getAuth(firebaseApp);
export default firebaseApp;
設定が完了したら、Firebase Authentication を使用してサンプルアプリにログインできます。認証トークンは Squid バックエンドに渡され、リソースへのアクセス管理に利用されます。データを保護する方法の詳細については、[security rules documentation](/docs/security/authentication/firebase/.