Snowflake
Squid can connect to a Snowflake database to serve as a data source for your Squid application.
Snowflake is designed to break down data silos within an organization, making it easier to collaborate over content with partners and customers. With Squid, you can connect your Snowflake databases and even join data with other database connectors.
To connect your Snowflake database to Squid, complete the following steps:
- Open the Squid Console and select your application to use with Snowflake.
- Click the Connectors tab, and then click Available connectors.
- Select the Snowflake connector.
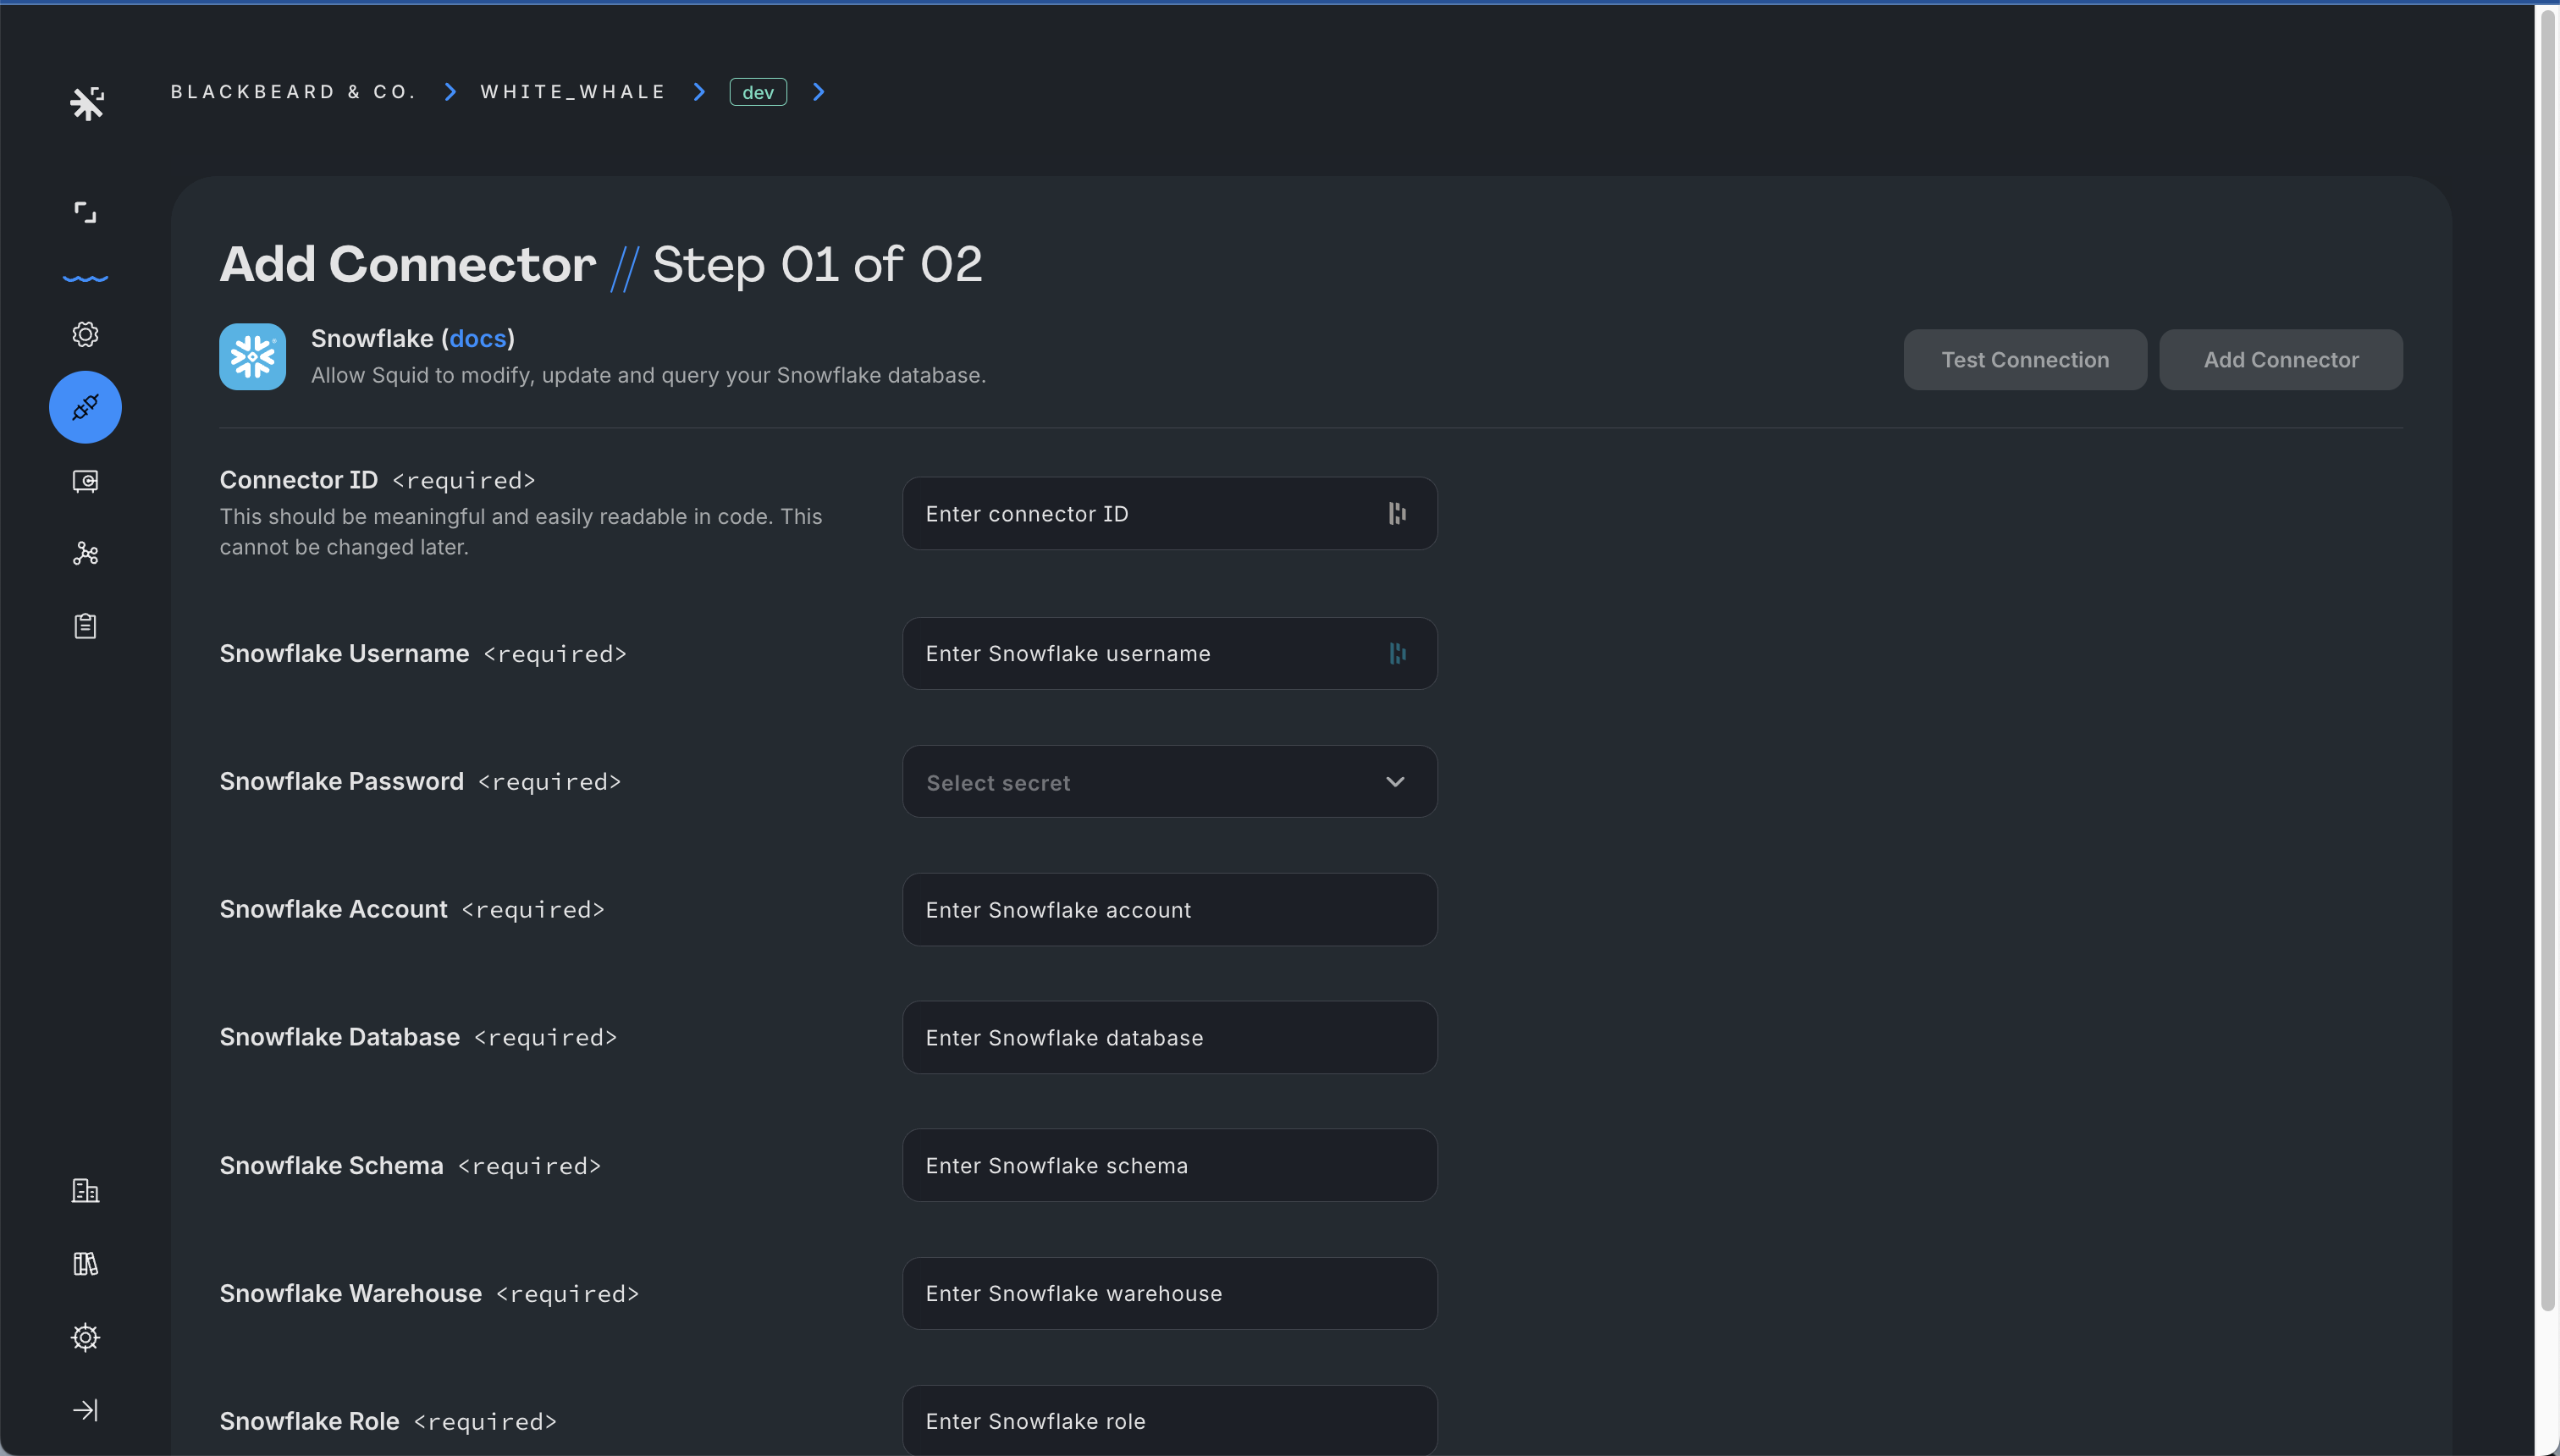
- Provide the following configuration information:
- Connector ID - Choose an ID that is brief and helps identify the connector.
- Snowflake username
- Snowflake password - to keep it private, store your password in Squid Secrets.
- Snowflake account ID - Open the menu next to the Snowflake icon in the Snowflake console to view your full account ID. You can use the Copy account identifier button in Snowflake to copy the ID. In the Squid Console, paste this ID and replace the . with a - so the result will be the following: Before: AAAAAAA.AAA00000 After: AAAAAAA-AAA00000
- Snowflake database name - The name of the database you're connecting. You can find the database name in the Data section of the Snowflake console.
- Snowflake schema - The name of the schema you're connecting. You can find the schema name by selecting your database in the Snowflake console, and then clicking the Schemas tab.
- Snowflake warehouse - The Snowflake warehouse name is found in the Snowflake console in the Admin tab. If you do not have access to the admin tab, you will need to ask your administrator for the name of the warehouse.
- Snowflake role - The name of the role in which the Snowflake database is located. You can find the Snowflake role in the Snowflake console under your Snowflake username.
Once you've entered the connection information, click Test connection to verify that the connection is successful.
To learn how to work with Snowflake data in Squid, view the Client SDK documentation.
Want to see something cool you can build when you connect to Snowflake? Check out this video on Squid AI queries with Snowflake!
Query with AI requires a primary key to be defined in your Snowflake database schema. To add a primary key, navigate to the schema tab of your SNowflake connector, and locate the field you want to be the primary key. Click the ... button, and then enable the Primary key dropdown. Click Save Schema to save your changes.
To learn more about Snowflake's network policies, check out the Snowflake documentation on network policies.