Quickstart - Create a CRUD app
These steps introduce the basics of using Squid in a full-stack application, from creating an app to adding create, read, update, and delete data functionality. Once you create an application in the Squid Console, you have the ability to use the Squid Client SDK in your client application, modify and retrieve data, and connect various data sources.
Build your own Squid app
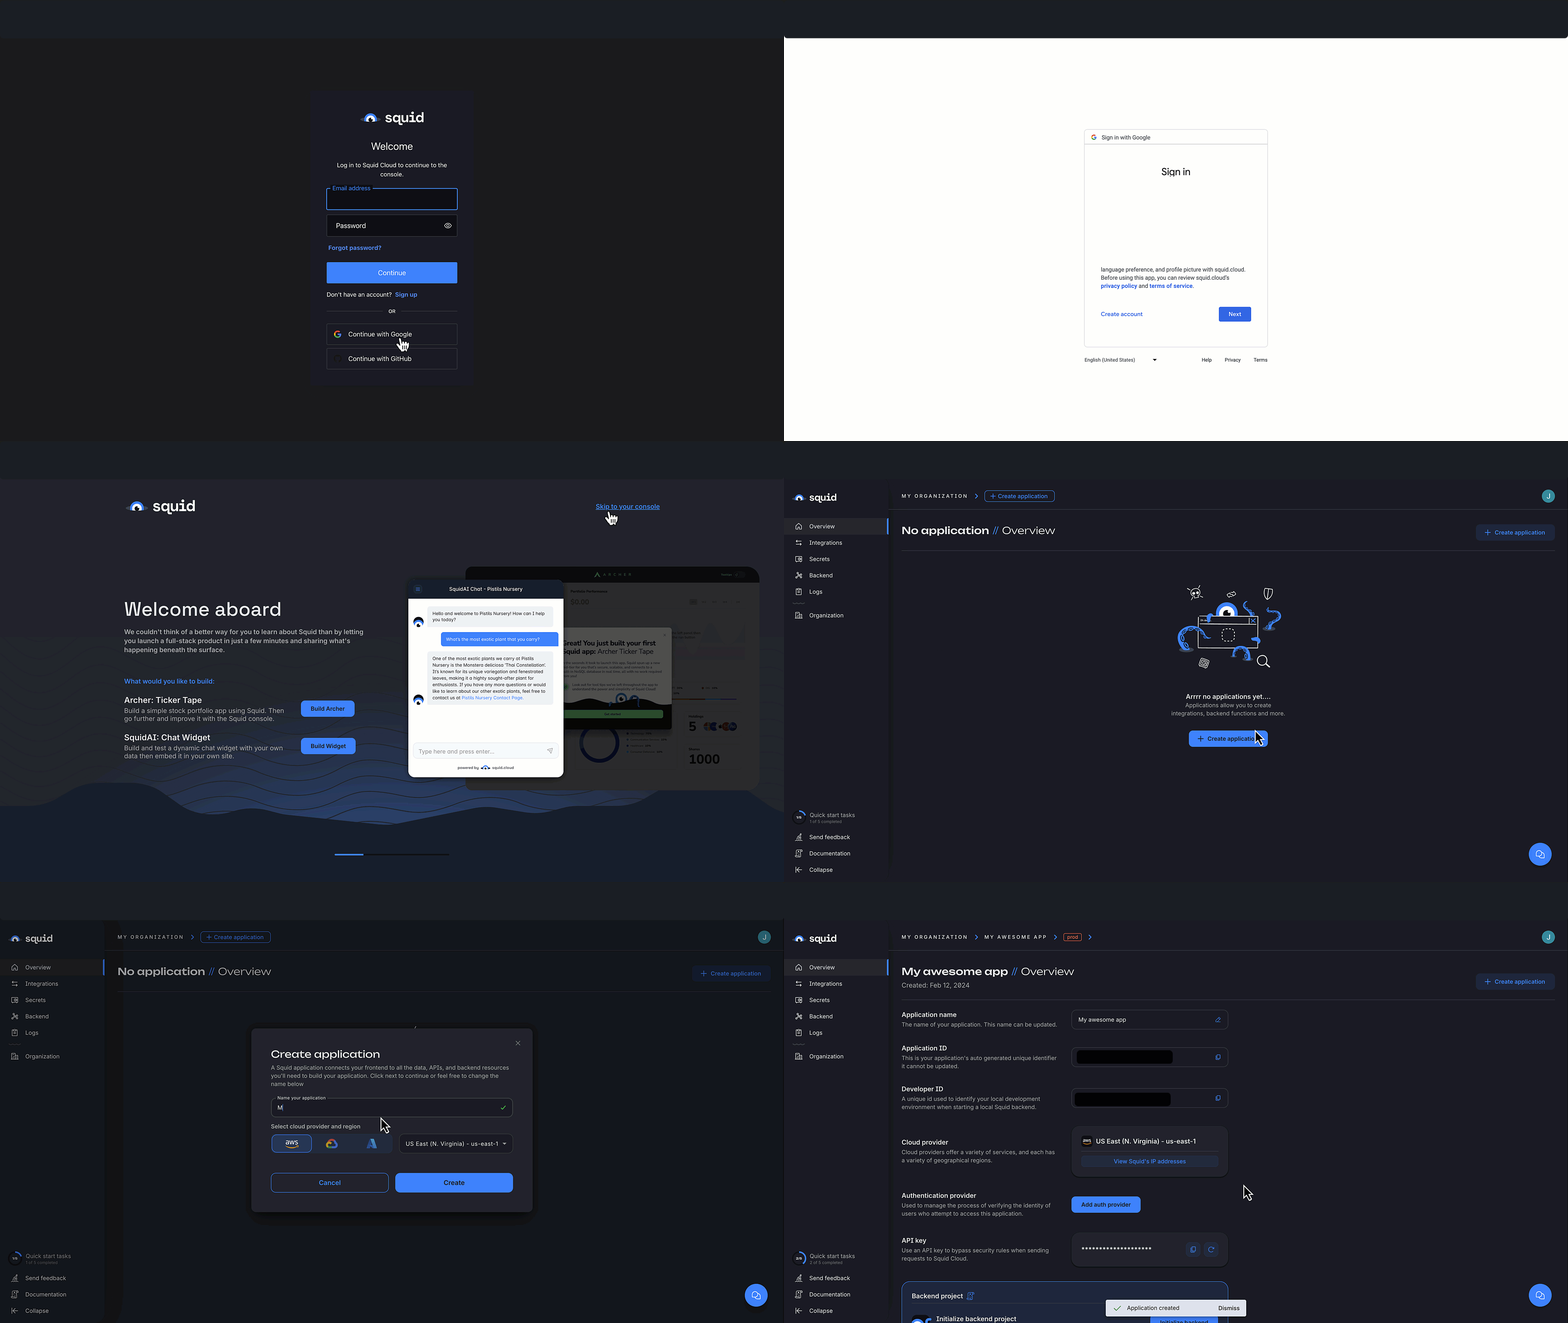
This section outlines how to create a new Squid app in the Squid Console. At the end, you'll be directed to the next step of the quickstart to set up the Squid backend.

Navigate to the Squid Console and create an account.
After creating an account, you have the option to try one of the onboarding apps or skip to the console.
The Archer Ticker Tape app is a great way to see a complete demo of Squid functionality in action. The SquidAI Chat Widget gives you the steps you need to create a widget you can embed in your website. Feel free to try out these apps to get hands-on with some features of Squid.
When you're ready to continue with this quickstart, click Skip to console.
Click Create application to create a new Squid application.
In the modal that appears, choose a name for your app, and then click Create.
Continue to the next step of the quickstart where you will set up the Squid backend.
Next steps
Set up the backend
Out of the box, Squid hosts a backend to connect your client and your data sources.
🦑 Set up the client
After completing the backend initialization, it is now time to set up our client. Continue on to this next step of the tutorial by creating a new client project.
Customize the client
Now that we have both a client and a backend, we can start to build a project with Squid! Developing with Squid allows us to easily use a database to insert, read, update, and delete data from the client-side without worrying about setting up an API.