Step 4: Create an AI agent workflow
Customize an AI agent with unique abilities to create a complete AI agent workflow
Agent Studio is the quickest way to start building a custom AI agent solution. In this tutorial, you'll build on the skills you developed in step 1, step 2, and step 3 of this series by creating an AI agent workflow.
What you'll build
- An AI agent workflow that lets you interact with sample business data in natural language without writing any code.
What you'll need
- This tutorial builds on the skills developed in steps 1 and 2 of this series, where you create your first AI agent. If you haven't completed this tutorial, please do so before continuing.
- A Squid account in the Squid Console
Create a New Agent
-
In the Squid Console, navigate to the Agent Studio tab.
-
Click Create New Agent to add an agent. A window will appear asking for an Agent ID and description.
- Agent ID:
workflow-agent. - Description:
This is an agent for Squid AI's agent workflow tutorial
- Agent ID:
-
Click Create to create the agent.
After creating the agent, you will be redirected to the Overview tab of your new agent.
Give the Agent Instructions
Providing the agent with custom instructions will give it a unique persona:
You are an expert assistant for an internal team at a homegoods business. You will answer questions about the homegoods business based on our data and your general knowledge.
Connect your Agent to the Sample Database
Next, you'll connect your agent to a sample database that contains information related to a homegoods business' products, orders, and customers. This will allow the agent to answer questions based on the data provided.
Add the database ability to the agent to allow your agent to query the database and retrieve data:
-
On your agent's Overview page in the Agent Studio tab, click on Add Abilities on the right side of the page.
-
Click on the Database ability and dropdown the Add New Database menu. Scroll down and select MongoDb. A screen will appear to configure the database connection. Provide the following details, which have been pre-configured by Squid AI for this tutorial:
- Connector ID:
homegoods-business - Connection String:
mongodb+srv://homegoods.gxz0j4q.mongodb.net/homegoodsBusiness - Database Username:
read-only - Database Password: Create a secret where the key is
mongodb-passwordand the value isidmSZKR9Mxz90F2M. After filling out these details, click Test Connection to ensure the connection is successful. If the connection is successful, click Add Connector to continue.
- Connector ID:
-
Once the connector is added, you will be redirected to the database's schema page. The database schema describes the structure of the database, including the collections and fields available for querying. It is important to provide descriptions of the database's schema so the AI agent has a better understanding of the structure of the data.
To add descriptions, drop down the AI features button on the Schema page and select Generate Descriptions.
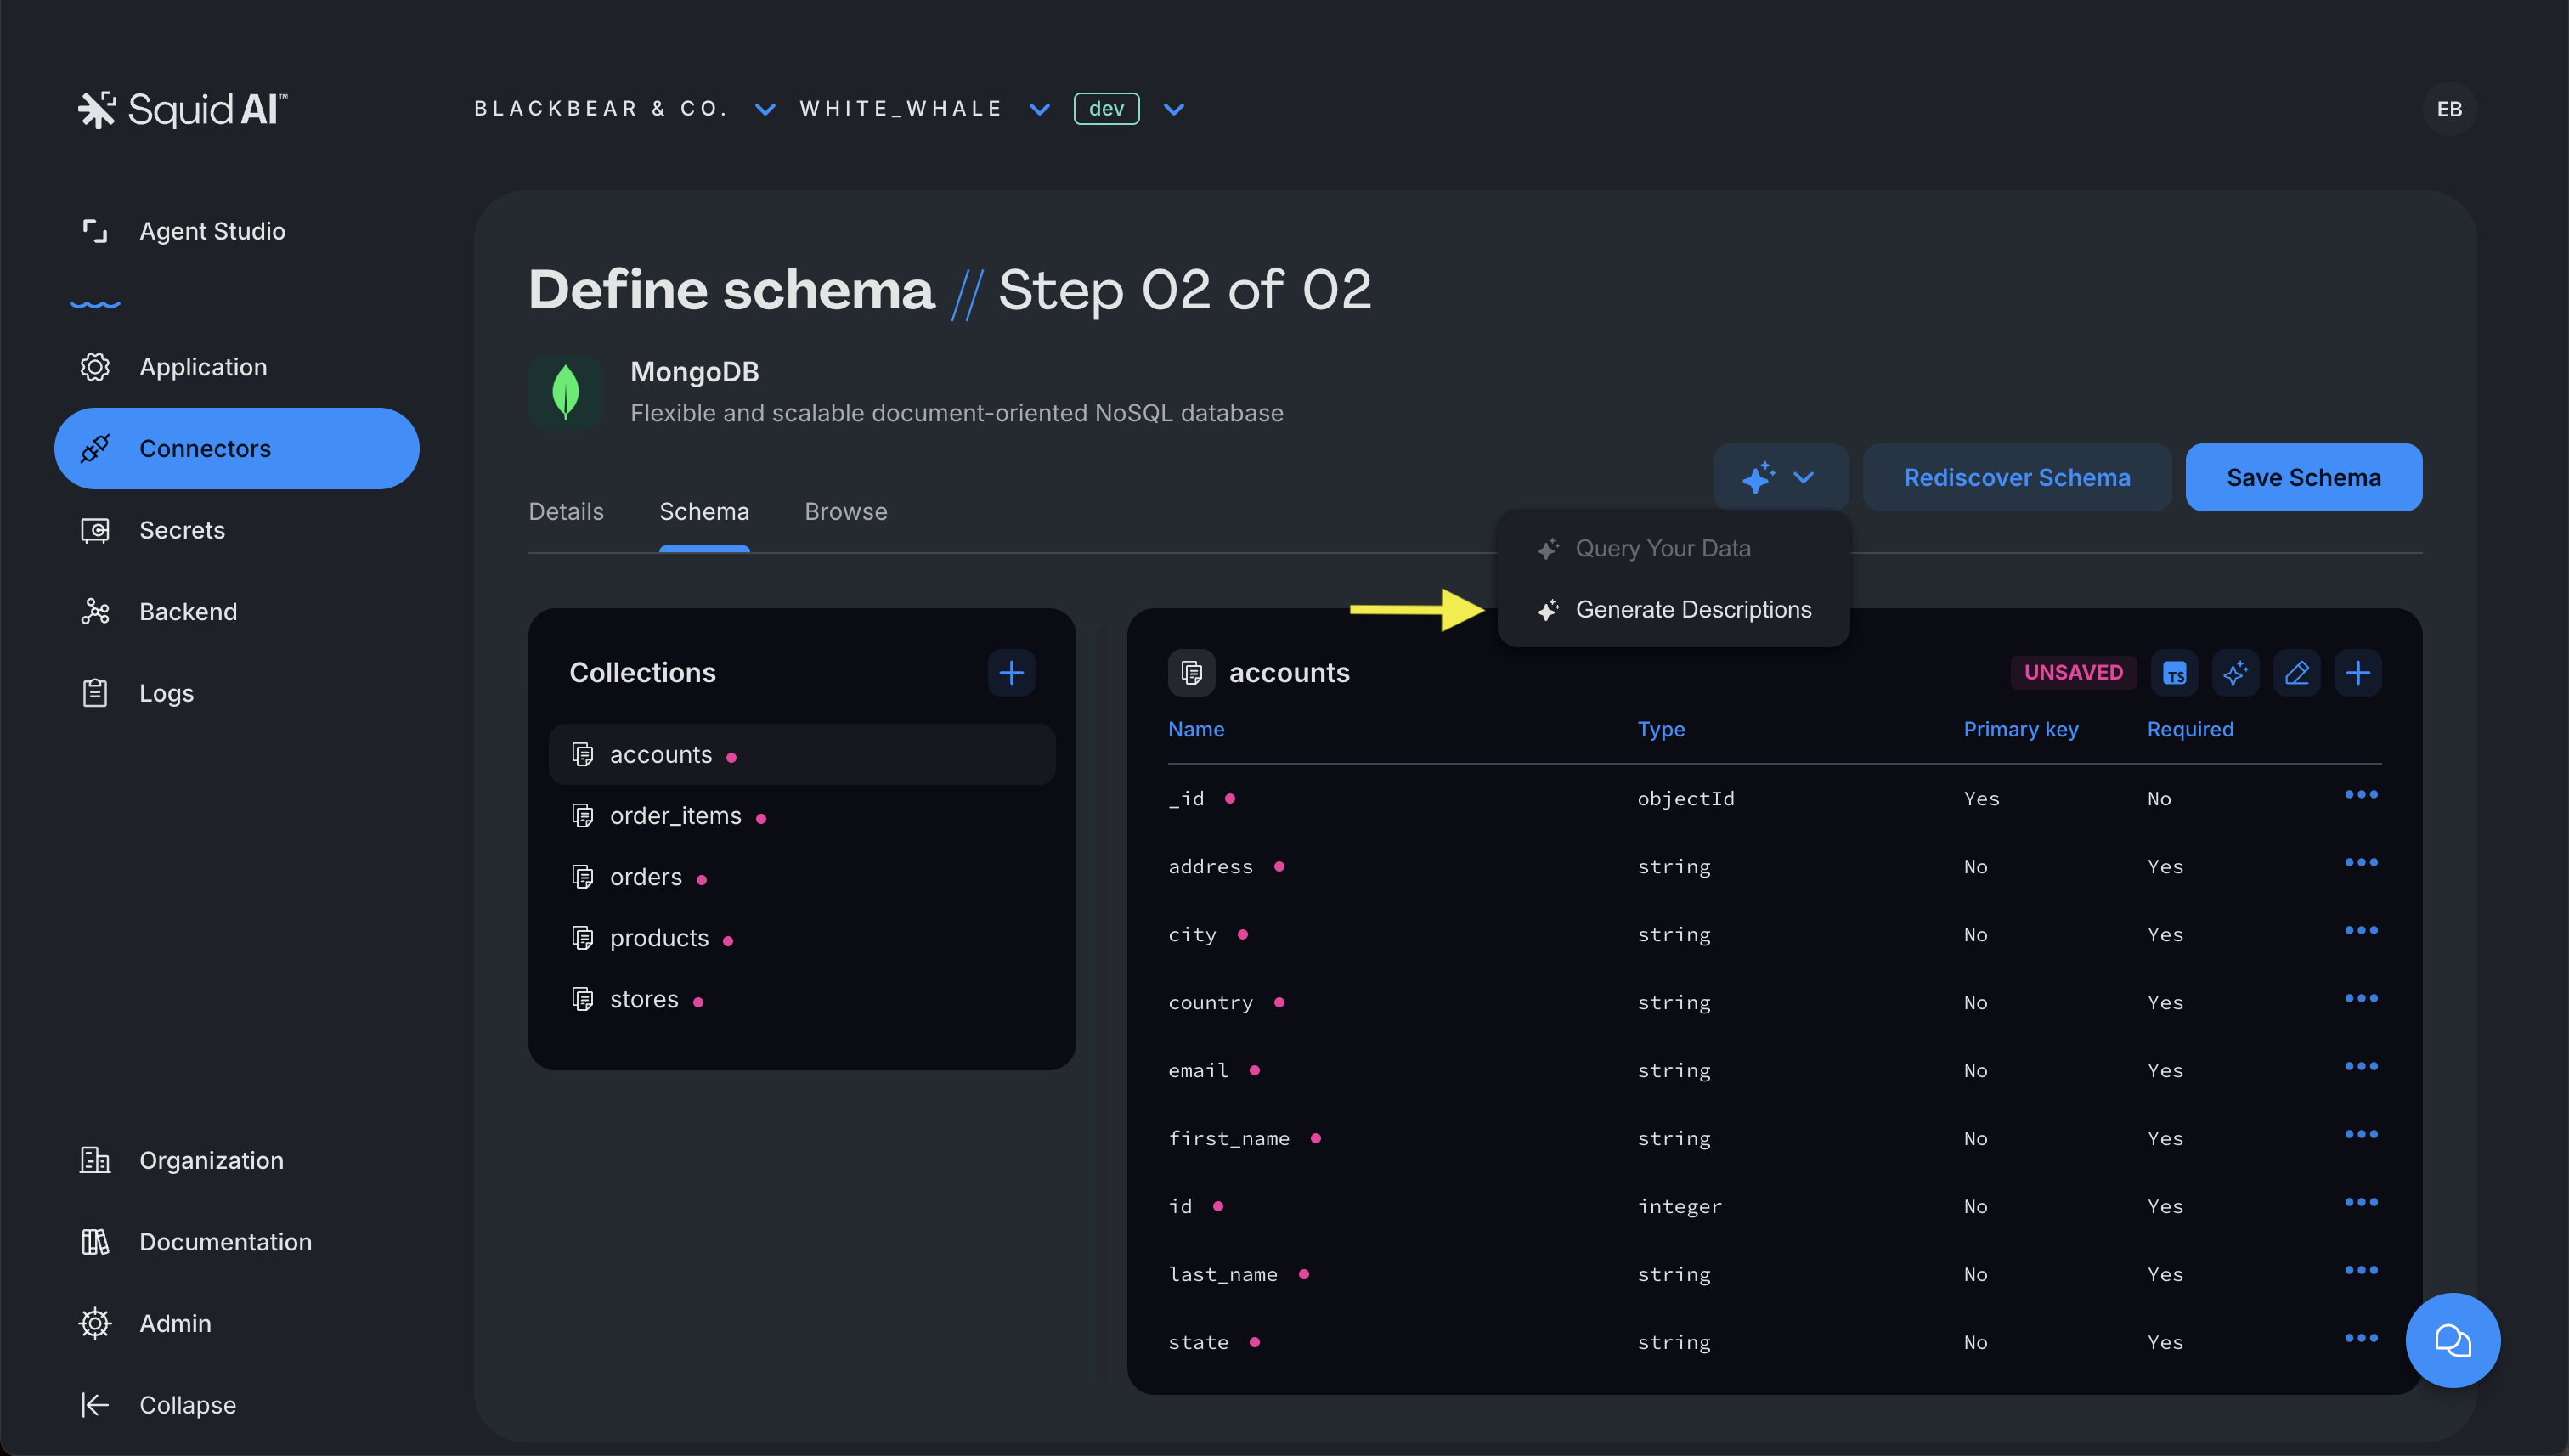
In the additional instructions pop-up, add the following instructions. Then click Confirm. Once the descriptions are generated, click Save Schema to save the changes:
All fields with a monetary value are in US dollars.
- Navigate back to your agent's Overview page by clicking on Agent Studio and selecting the
workflow-agentagent.- Click on Add Abilities on the right side of the page.
- Click on the Database ability and click the + symbol to add the MongoDB connector with an ID of homegoods-business.
- A screen will appear asking for instructions on when to use the ability, instructions on how the agent should use the ability, and a field for specifying specific collections to query in the database. Use the following value for the When to use field, leaving the other two blank:
Call this connector whenever the user asks about our homegoods orders.
- Click Add connector to add the ability to the agent. The database ability is now ready to use!
Extend the Agent's Capabilities
Each agent comes with a few built-in abilities that can be added to extend the agent's functionality. These abilities include knowledge bases and specialized AI functions. In this guide we will add two AI functions to the agent's list of abilities.
- On the Overview page of your agent, click on Add Abilities on the right side of the page.
- Scroll down to the AI Functions section and add the
createPdfFromHtml. This ability enables the agent to generate PDFs, a useful ability for creating reports, insights, and summaries. - Repeat step 1 to add a second AI function,
searchWeb. We will use this ability to augment the agent with additional knowledge from the web. This is useful for answering questions that are not directly related to the data in the database.
The AI Agent Workflow
All three of the agent's abilities work together to create a customized AI agent workflow. The functionality is extended by Squid AI's built-in features, such as table, chart, and graph generation. Here are some sample prompts to send to the AI agent in the Test Agent tab:
1. Generate a PDF invoice for order ID 63572.
2. Who are some of our biggest competitors in the homegoods space?
3. Create a line graph of margin percentages for each product type throughout 2024.
4. Show me a table of customers who have placed multiple orders.
5. What percent of orders were placed online?
6. Create a stacked bar chart showing the value of orders each month in 2024 by order state.
7. Show me a chart of refunds as a percentage of total sales in each month of 2024 as a line and my total sales as a bars on that same graph.
Test prompts that combine multiple abilities, such as, "Create a PDF with a list of all orders with a total over 1000", or "Search the web for the cheapest available overnight shipping to the customer's address for order ID 17011."
It is important to understand the capabilities and limitations of each ability in order to most effectively use AI agents. For example, some data may not exist in the database, or the AI agent may not have access to all the information necessary. In these cases, the agent will provide a response indicating that it is unable to answer the question.
Next Steps
Congratulations! You've successfully created an AI agent workflow. You now have a basic understanding of how to create and customize a no code AI workflow.
-
Continue with the next tutorial in the Agent Studio onboarding series: Coming soon...
-
Want to build a highly customized AI agent workflow? Build with Squid's SDKs to create a custom agent, or check out an AI tutorial for a hands-on learning experience. For technical developers only.
-
Have a question? Please reach out to us! We are happy to help you get started.